This is a first for me for several elements of this refinished piece. It is the first time I have ever attempted a geometric design and it is the theme of this month's Fab Furniture Flippin' Contest, my first time to try this month's sponsor, General Finishes' products, and my first time top coating with a foam pad brush.
When I first read the theme was geometric design, my heart jumped with excitement. Then it sank hard. I love the look of geometric pieces, the funkiness and fun. The boldness. The precision. Geometric designs have clean straight lines and smooth curves. No wobbles. I was scared.
Punch in the gut administered--I did not think I could be capable of creating a decent design on a scrap of paper never mind an actual real live piece of furniture. I seriously believed I just may ruin my innocent wooden victim. I fully appreciate all design genres, and this was my opportunity to cut loose and do something I have admired, but would probably never feel confident to attempt without a definite reason such as this contest to push me. I concede I was stumped at how to create then implement one, and honestly felt in over my head. But, I wanted to try very badly, so I stuck to it and began to hunt for the furniture candidate to be my poor prey.
I knew what the shapes and forms are for the most part and that I wanted to incorporate circles. Yet, I wasn't really sure if circles were considered to be a geometric dimension. So I googled 'is a circle considered a geometric shape?' Don't laugh. I seriously needed to be sure that it is classified under geometric before I started. Apparently others have inquired the same because the search bar yielded my request as I typed.
Well, they certainly are a geometric element. In fact, the sphere or circle is stated to be one of the most significant entities in the geometric stream of shapes. Excellent. I had a start.
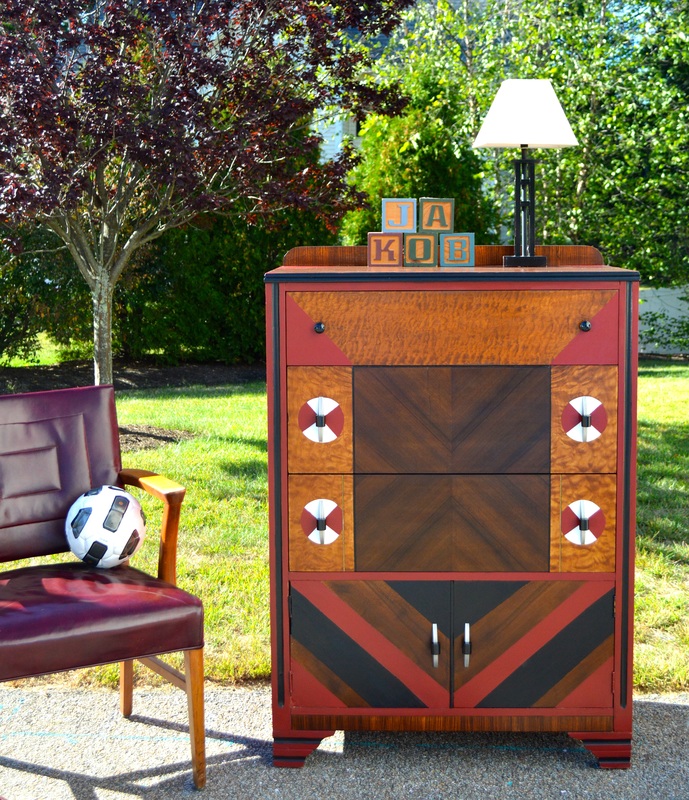
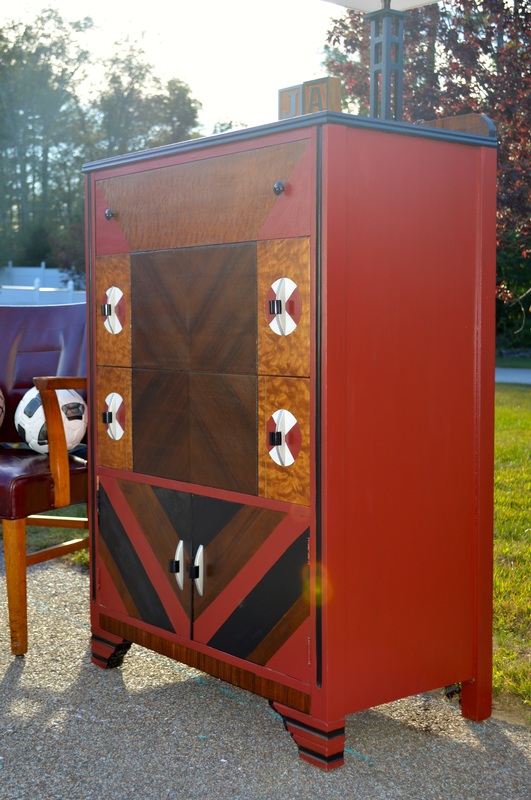
I wanted to find a piece of furniture to work with this design in mind. I landed this beautiful mid century tall dresser and it was perfect for this theme. It had incredible grain to its veneer which showed off geometric lines naturally. It was clearly meant to be. What is the buzz word for that-serendipity? It was serendipity to me. I bought it immediately knowing it was the perfect piece to enhance and draw out its existing natural geometric design with a touch of paint.
Now I sat and stared. And stared. I was waiting for the design to plop into my head. Feeling more and more chicken, I had to just dig in, or should I say, slap the paint to the wood to get over the intimidation this theme presented to me, a cottagey, shabby chic-er.
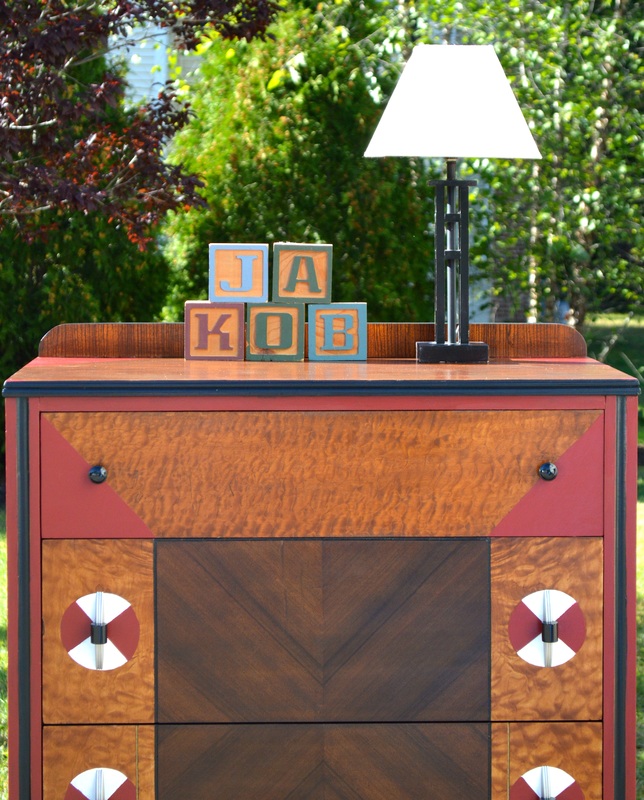
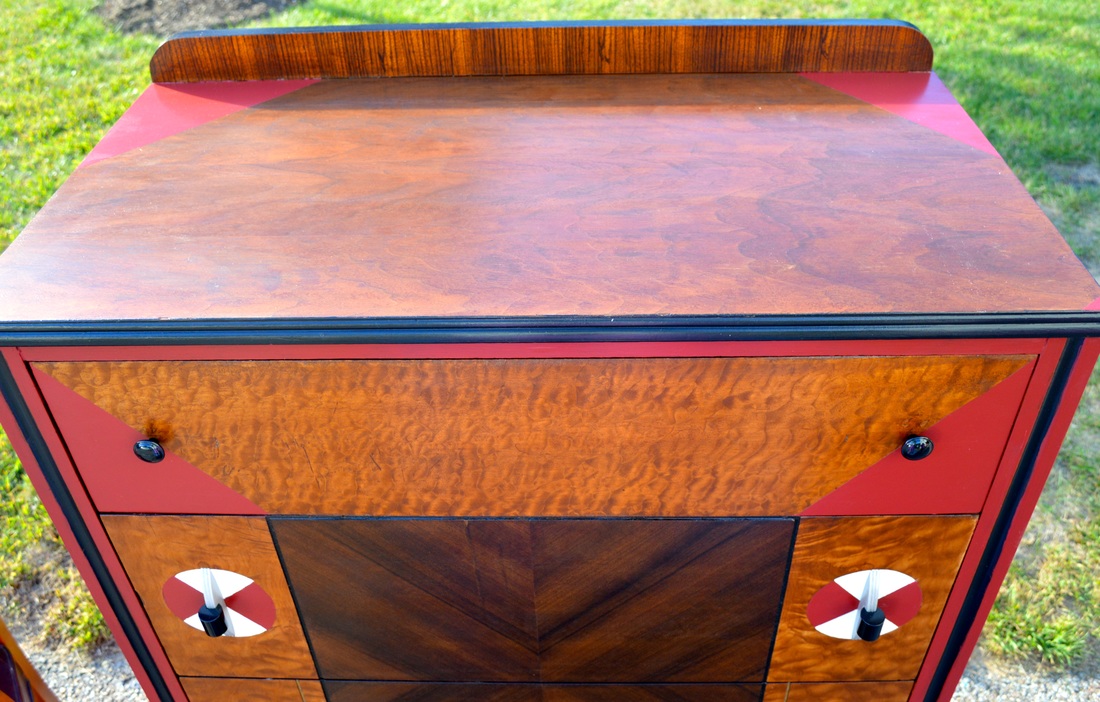
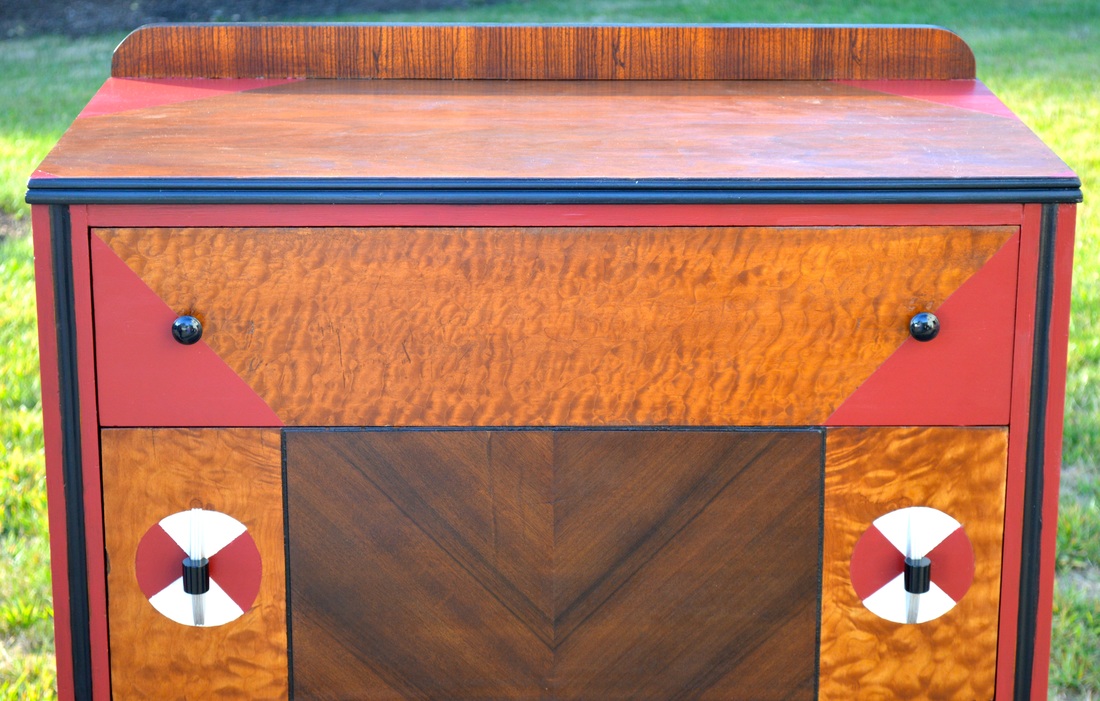
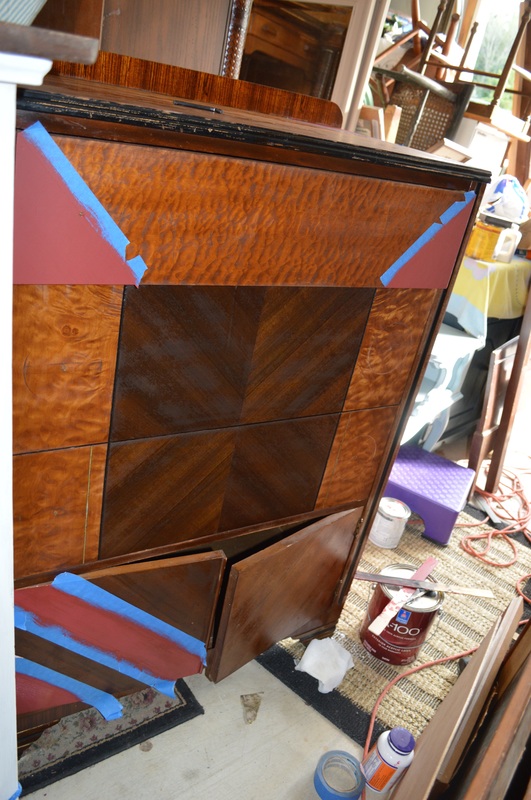
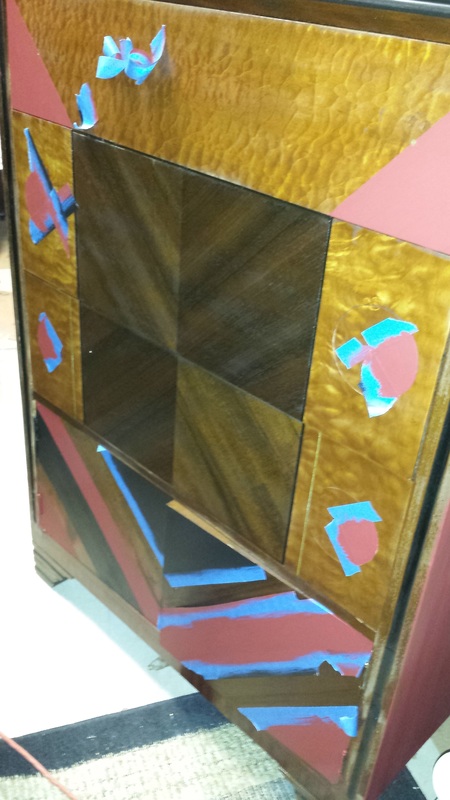
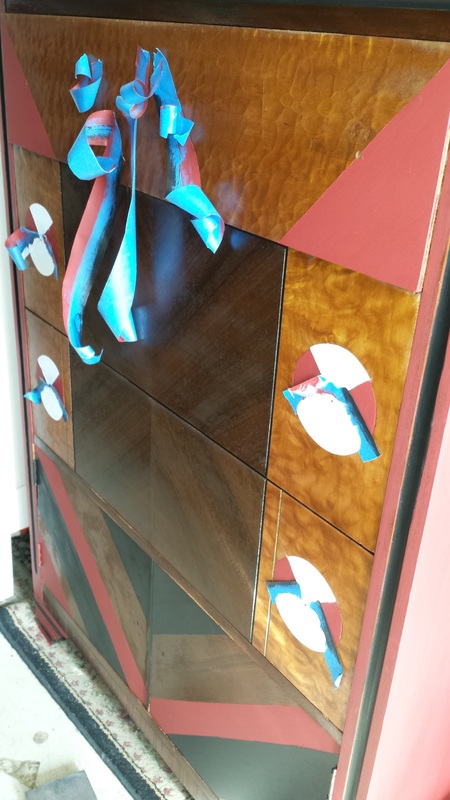
I started with the top drawer which I had planned to add triangles to the corners. Then when I saw the shape they defined, I decided to carry that across the top creating a hexagon from the top down to the front drawer by adding triangles equidistant from corner to corner. Very cool how that came together.
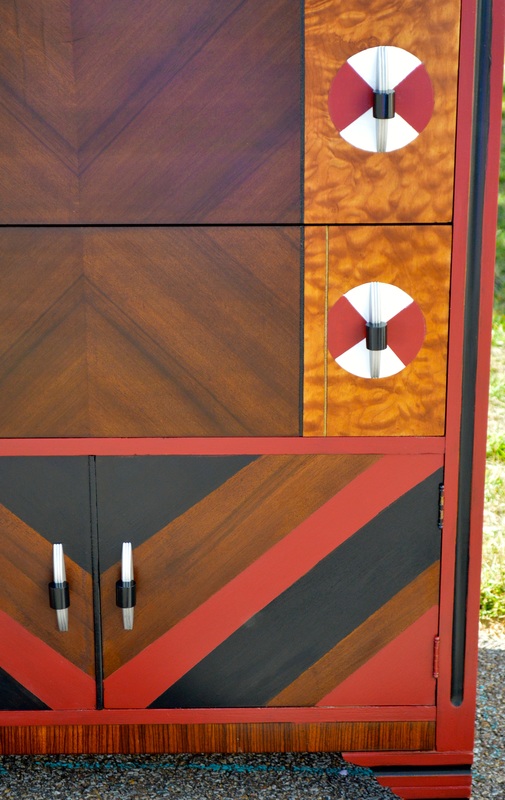
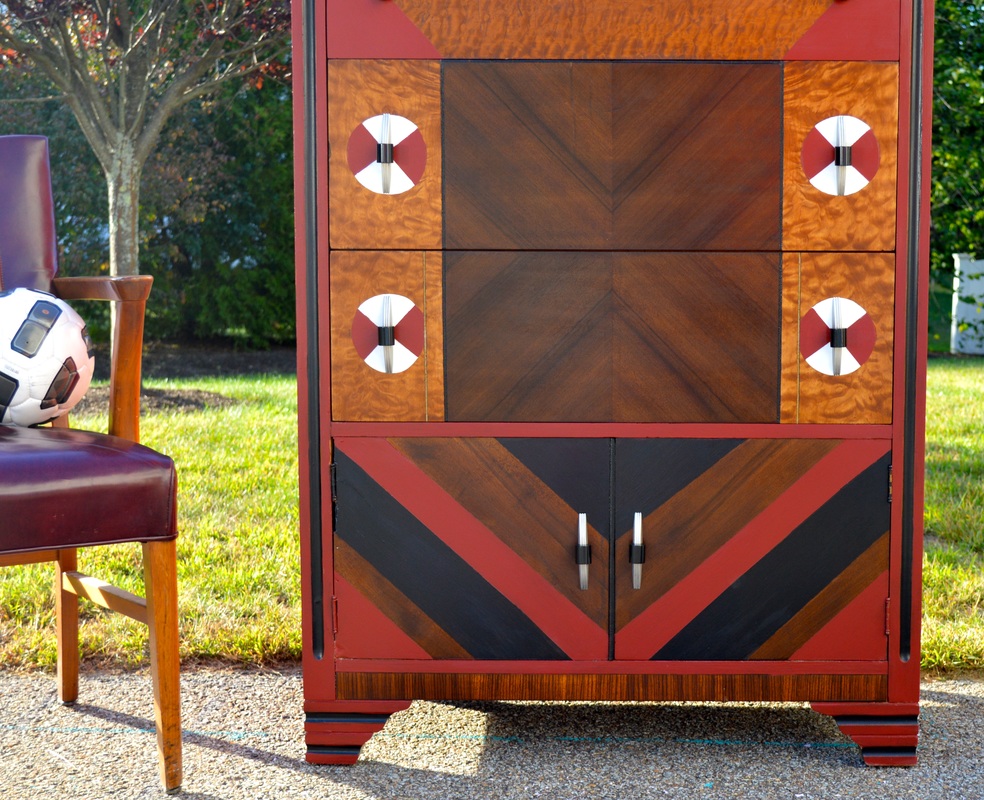
The original hardware was metal half circles with cylinder knobs which I repainted nickel and glossy black. I loved the contrast of the circles with the triangles and angled stripes. Like I said, this piece had great geometric lines in the veneer. I stripped and retained the entire top and face of the dresser to highlight those features. On the bottom cubby, I wanted to mimic the lines ingrained in the mid sections of the centers of the two middle drawers, so I angled some stripes which would meet between the doors. I was starting to love doing this. There was one missing knob on the top drawer, so I painted two metal knobs the same glossy black to go with the cylindrical knobs on the metal pulls.
I began taping off angled stripes. I used a highly technical measurement tool. The crude estimation of my pinky finger length and my peering, can't see close up eyeball. For the trim across the top and bottom had a funky vertical stripe so I left them to show themselves amidst the additional shapes joining in the fun.
I chose red, black and a touch of white to keep the warmth of the wood tone yet make a striking statement that would complement the strong features it was coordinating with. I custom mixed the red because I had a specific tone in mind.
After hours of taping, painting, measuring, taping, painting, measuring, it was time to pull the whole piece together with the top coat.
The wonderful sponsor, as I mentioned, was General Finishes. Since I had never used any of their products before, I opted to try their topcoats. I am a finicky topcoat person, and tend to love wax and oil based polyurethane. I read raving reviews about their water based High Performance topcoat, so I had high expectations.
It did not fail. I was nervous applying it because I had yet to find a water based product that I truly loved. I was also nervous because it said to apply with a foam brush. I am also a Purdy person. I purchased a wide foam brush and went to it. It applied easily, smoothly and efficiently. I was impressed. After two coats, I did switch to a regular brush because I wanted to see the results.
I really put this product to the test, and it passed brilliantly. I needed it to cover both oil stain and chalk paint, veneer and wood. And I changed application methods. Wow, I can attest to the quality of General Finishes' High Performance Topcoat. I wanted a sleek, soft sheen depth, and that is what it provided, over both types of refinishing I had done. I now have a new favorite water based topcoat.
This FFFC theme put me to the test, while I reciprocated testing some new concepts and products. I enjoyed the challenge and gained a new product to beautifully finish off my pieces.
When I first read the theme was geometric design, my heart jumped with excitement. Then it sank hard. I love the look of geometric pieces, the funkiness and fun. The boldness. The precision. Geometric designs have clean straight lines and smooth curves. No wobbles. I was scared.
Punch in the gut administered--I did not think I could be capable of creating a decent design on a scrap of paper never mind an actual real live piece of furniture. I seriously believed I just may ruin my innocent wooden victim. I fully appreciate all design genres, and this was my opportunity to cut loose and do something I have admired, but would probably never feel confident to attempt without a definite reason such as this contest to push me. I concede I was stumped at how to create then implement one, and honestly felt in over my head. But, I wanted to try very badly, so I stuck to it and began to hunt for the furniture candidate to be my poor prey.
I knew what the shapes and forms are for the most part and that I wanted to incorporate circles. Yet, I wasn't really sure if circles were considered to be a geometric dimension. So I googled 'is a circle considered a geometric shape?' Don't laugh. I seriously needed to be sure that it is classified under geometric before I started. Apparently others have inquired the same because the search bar yielded my request as I typed.
Well, they certainly are a geometric element. In fact, the sphere or circle is stated to be one of the most significant entities in the geometric stream of shapes. Excellent. I had a start.
I wanted to find a piece of furniture to work with this design in mind. I landed this beautiful mid century tall dresser and it was perfect for this theme. It had incredible grain to its veneer which showed off geometric lines naturally. It was clearly meant to be. What is the buzz word for that-serendipity? It was serendipity to me. I bought it immediately knowing it was the perfect piece to enhance and draw out its existing natural geometric design with a touch of paint.
Now I sat and stared. And stared. I was waiting for the design to plop into my head. Feeling more and more chicken, I had to just dig in, or should I say, slap the paint to the wood to get over the intimidation this theme presented to me, a cottagey, shabby chic-er.
I started with the top drawer which I had planned to add triangles to the corners. Then when I saw the shape they defined, I decided to carry that across the top creating a hexagon from the top down to the front drawer by adding triangles equidistant from corner to corner. Very cool how that came together.
The original hardware was metal half circles with cylinder knobs which I repainted nickel and glossy black. I loved the contrast of the circles with the triangles and angled stripes. Like I said, this piece had great geometric lines in the veneer. I stripped and retained the entire top and face of the dresser to highlight those features. On the bottom cubby, I wanted to mimic the lines ingrained in the mid sections of the centers of the two middle drawers, so I angled some stripes which would meet between the doors. I was starting to love doing this. There was one missing knob on the top drawer, so I painted two metal knobs the same glossy black to go with the cylindrical knobs on the metal pulls.
I began taping off angled stripes. I used a highly technical measurement tool. The crude estimation of my pinky finger length and my peering, can't see close up eyeball. For the trim across the top and bottom had a funky vertical stripe so I left them to show themselves amidst the additional shapes joining in the fun.
I chose red, black and a touch of white to keep the warmth of the wood tone yet make a striking statement that would complement the strong features it was coordinating with. I custom mixed the red because I had a specific tone in mind.
After hours of taping, painting, measuring, taping, painting, measuring, it was time to pull the whole piece together with the top coat.
The wonderful sponsor, as I mentioned, was General Finishes. Since I had never used any of their products before, I opted to try their topcoats. I am a finicky topcoat person, and tend to love wax and oil based polyurethane. I read raving reviews about their water based High Performance topcoat, so I had high expectations.
It did not fail. I was nervous applying it because I had yet to find a water based product that I truly loved. I was also nervous because it said to apply with a foam brush. I am also a Purdy person. I purchased a wide foam brush and went to it. It applied easily, smoothly and efficiently. I was impressed. After two coats, I did switch to a regular brush because I wanted to see the results.
I really put this product to the test, and it passed brilliantly. I needed it to cover both oil stain and chalk paint, veneer and wood. And I changed application methods. Wow, I can attest to the quality of General Finishes' High Performance Topcoat. I wanted a sleek, soft sheen depth, and that is what it provided, over both types of refinishing I had done. I now have a new favorite water based topcoat.
This FFFC theme put me to the test, while I reciprocated testing some new concepts and products. I enjoyed the challenge and gained a new product to beautifully finish off my pieces.
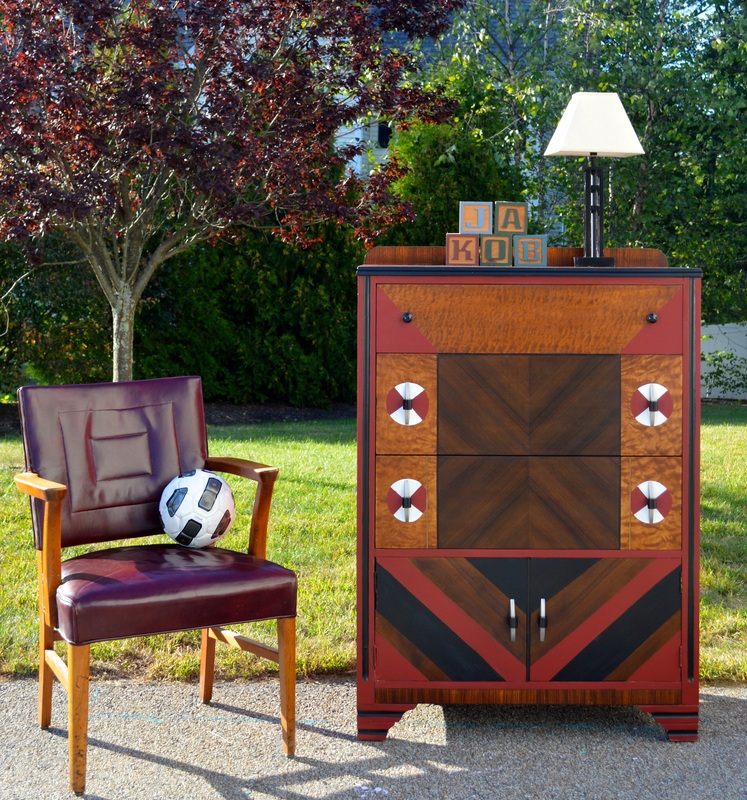
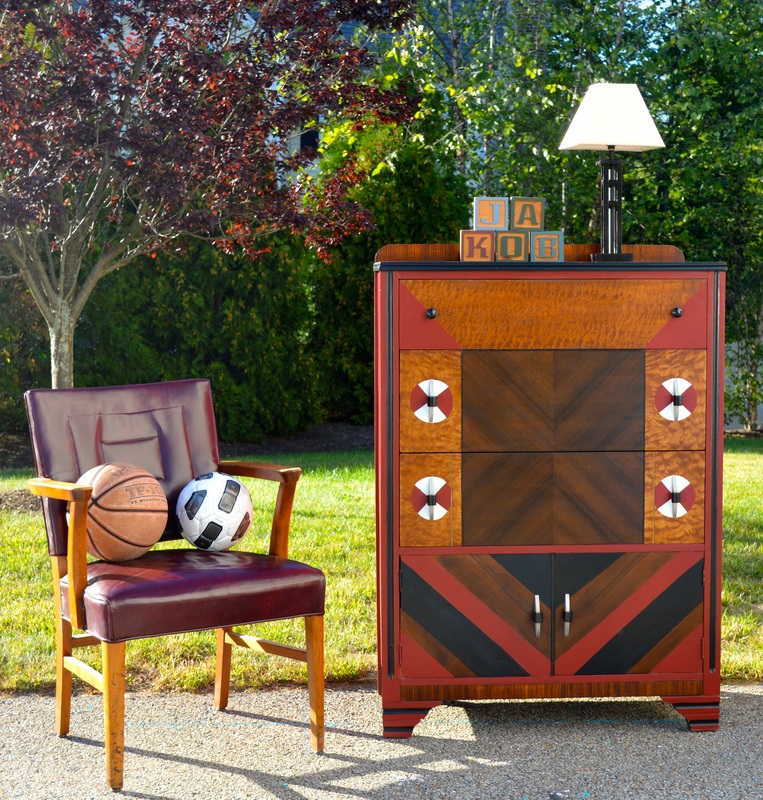
I also was unsure of staging for a geometric piece because they are so intricate. Then this chair popped up for sale, and I thought it was so great with its square inlay stitching on the back. Hexagons on the round soccer ball, vertical rectangular lamp base and square letters completed the look without competing with the dresser. Then I added the basketball just because I liked it.


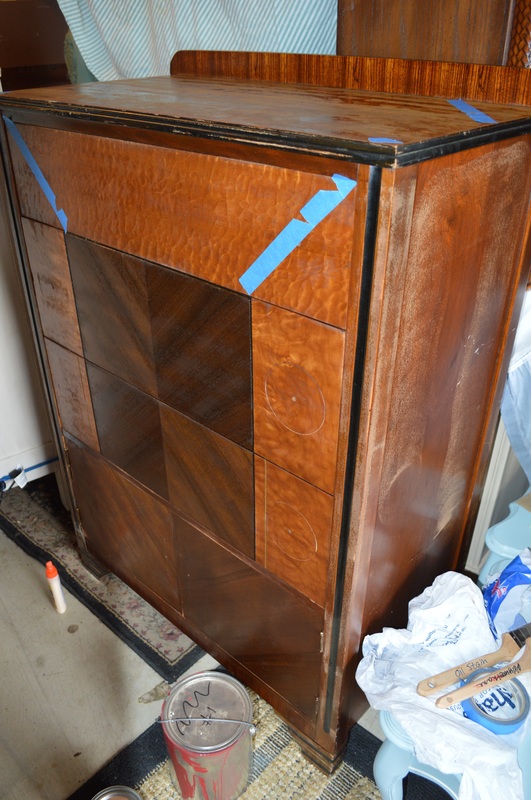
Here it is stripped and restained with the first of several rounds of taping. Notice how blotchy the newly stained top is here, then how the High Performance Topcoat gave it a smooth sheen in the photos above:
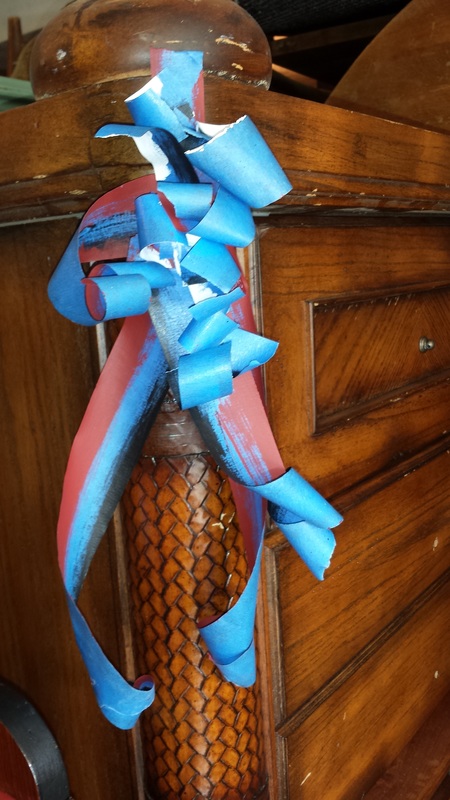
Do not throw away your tape as you work through your design. Make a scrap bow and reuse it if it is still flat enough to prevent bleeding edges.
I sincerely thank the wonderful hosts of this month's contest, Carrie from Thirty Eighth Street and Lynn from Fern Avenue plus all the cohosts who make this all happen. For more information you may email Stacy at http://[email protected] or Evey at http://[email protected].


 RSS Feed
