I am delighted and honored to bring this post to you as my first in a series as an official brand blogger for Old Fashioned Milk Paint. My grin stretches sea to shining sea. This paint has my heart all bundled up in its paper bags of green, natural, powdery perfection. OFMP sponsored this project by providing me with the product to complete it.

I would like to share the process of creating a beautiful shabby chic dresser using OFMP's milk paint and a touch of adornments. But first, let me offer a bit of history which you may also review here, http://www.milkpaint.com/about_hist..., and description of this brand of milk paint. They are the original company to bring the modern day powder formula to market as genuine milk paint. It is a true milk paint, all natural, green and non-toxic. OFMP has a lovely palette of their standard colors to choose from, and then by mixing and playing with combinations, one can create a host of shades and tones. Speaking of shades and tones, because of the natural pigmentation in milk paint, it covers with beautiful shading and has a very authentic ambiance to its finish.
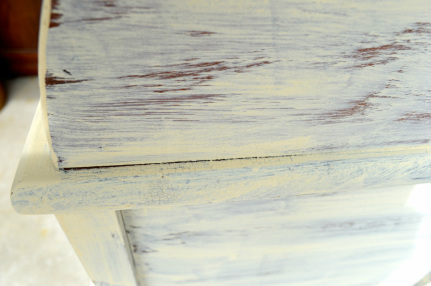
Also, being true milk paint, it must be mixed with water in equal parts of paint to water ratios. It has exquisite characteristics as it coats and dries. It can stick fully to porous surfaces, or chip and crackle on non-porous surfaces. In order to ensure adhesion to non-porous or shiny surfaces, they have a great product called extra bond which gets blended into the premixed paint for the first coat.
Milk paint is self-leveling so it sets smoothly on your surface. I am telling you, this paint is the way to go. It is mesmerizing to watch as it dries and graces your piece with a unique finish unlike any other paint.
It does need to be topcoated as it is extremely matte. If you want your piece to gather household and everyday, how shall I say it... grime for patina...then you can opt to leave it to collect memories of life around it.
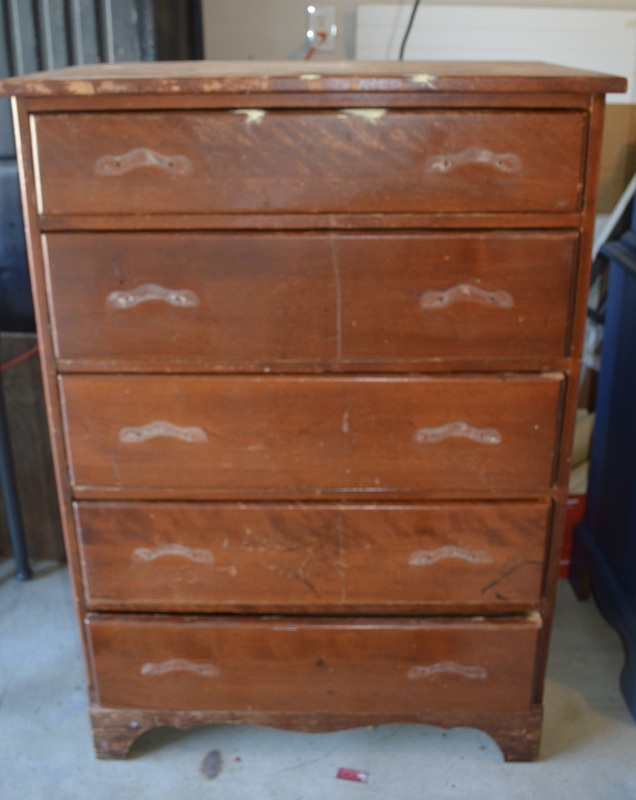
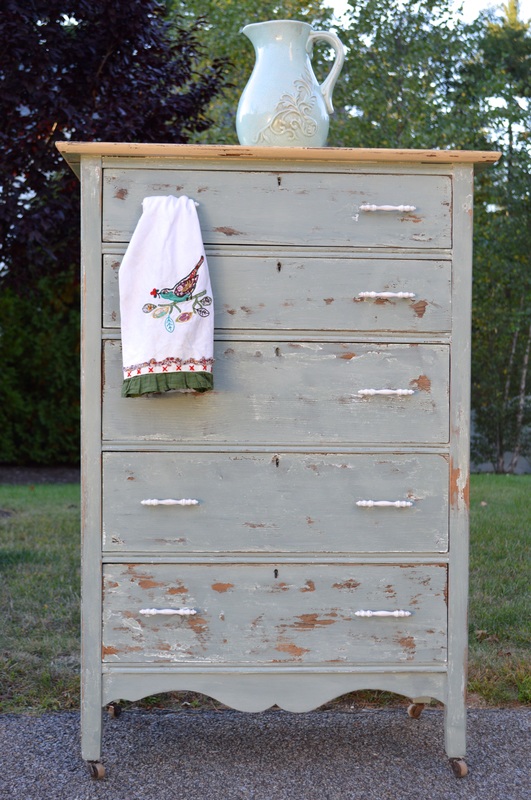
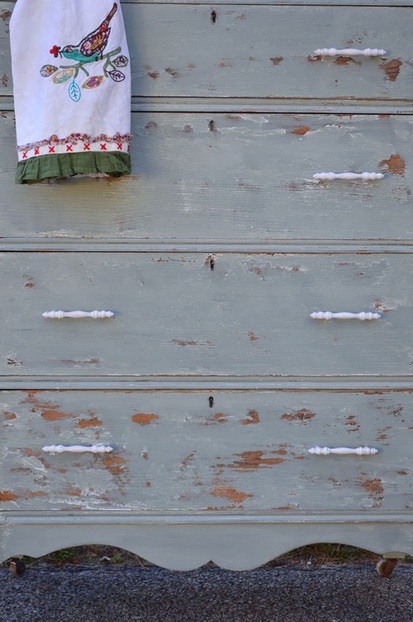
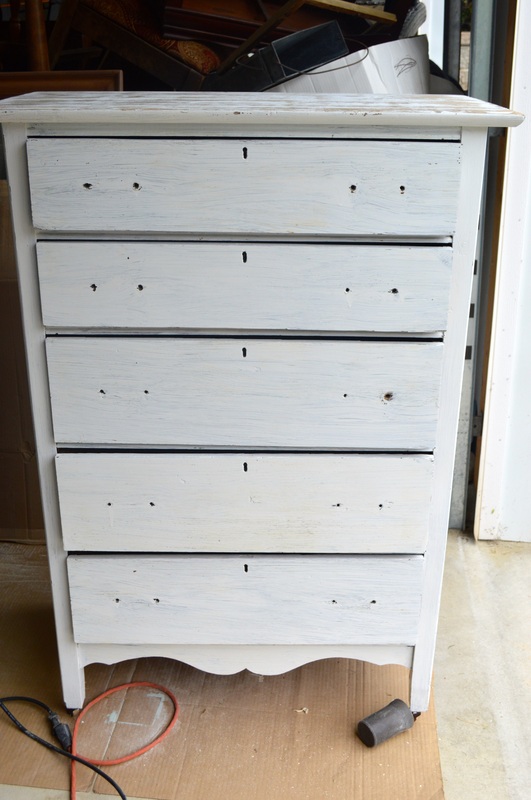
I chose to refinish a very old and excellent quality tall chest made by Union decades ago. Here begins this piece's journey from marred and abandoned in its homeliness to all dressed up and waiting for somewhere to go in its new country chic finish.
Here it sits bare and beat:
Also, being true milk paint, it must be mixed with water in equal parts of paint to water ratios. It has exquisite characteristics as it coats and dries. It can stick fully to porous surfaces, or chip and crackle on non-porous surfaces. In order to ensure adhesion to non-porous or shiny surfaces, they have a great product called extra bond which gets blended into the premixed paint for the first coat.
Milk paint is self-leveling so it sets smoothly on your surface. I am telling you, this paint is the way to go. It is mesmerizing to watch as it dries and graces your piece with a unique finish unlike any other paint.
It does need to be topcoated as it is extremely matte. If you want your piece to gather household and everyday, how shall I say it... grime for patina...then you can opt to leave it to collect memories of life around it.
I chose to refinish a very old and excellent quality tall chest made by Union decades ago. Here begins this piece's journey from marred and abandoned in its homeliness to all dressed up and waiting for somewhere to go in its new country chic finish.
Here it sits bare and beat:
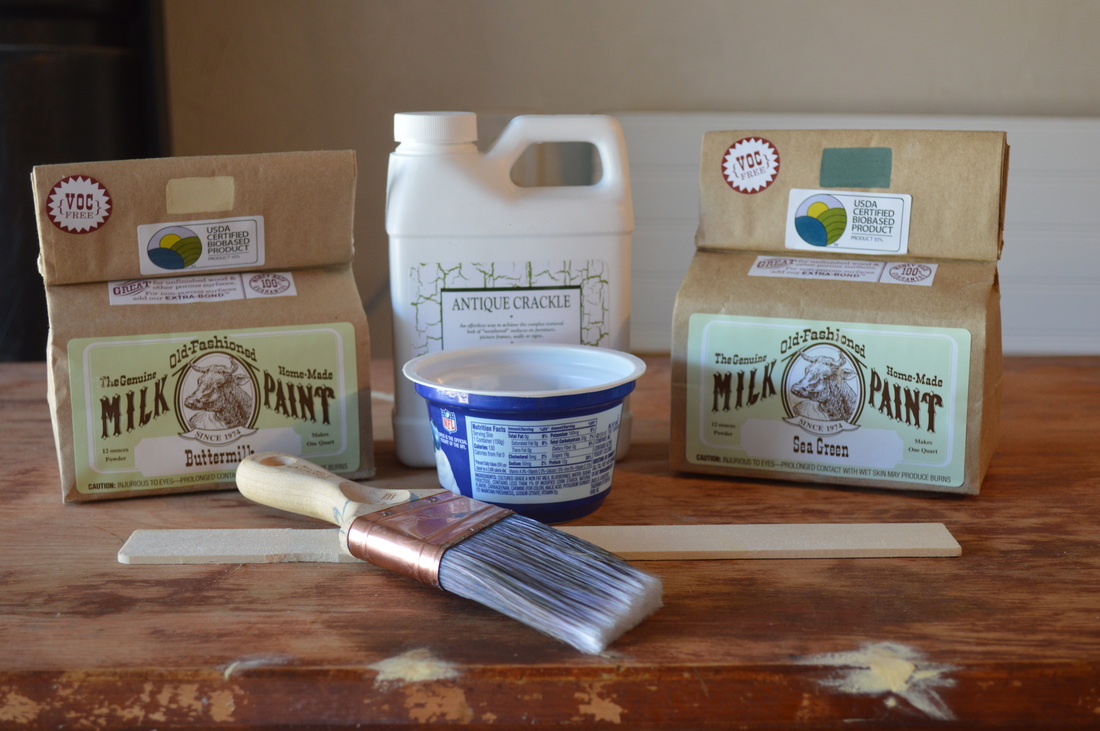
And here comes my paint hero, OFMP in Sea Green and Buttermilk to rescue it from all that dull brown:
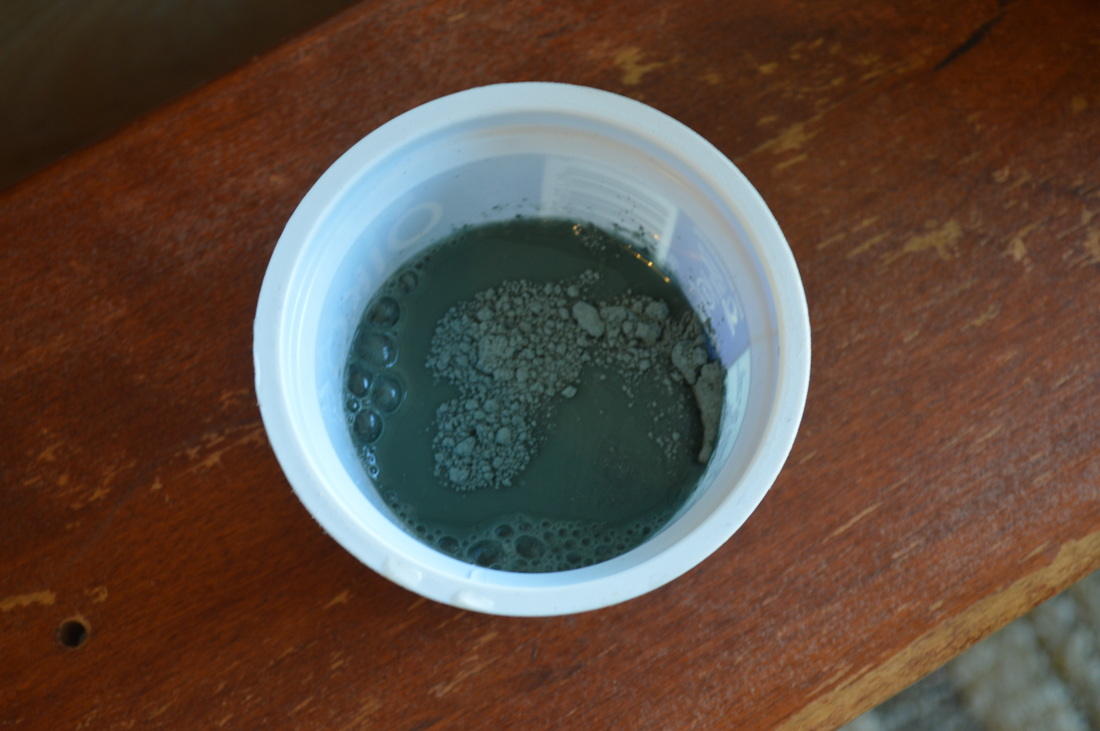
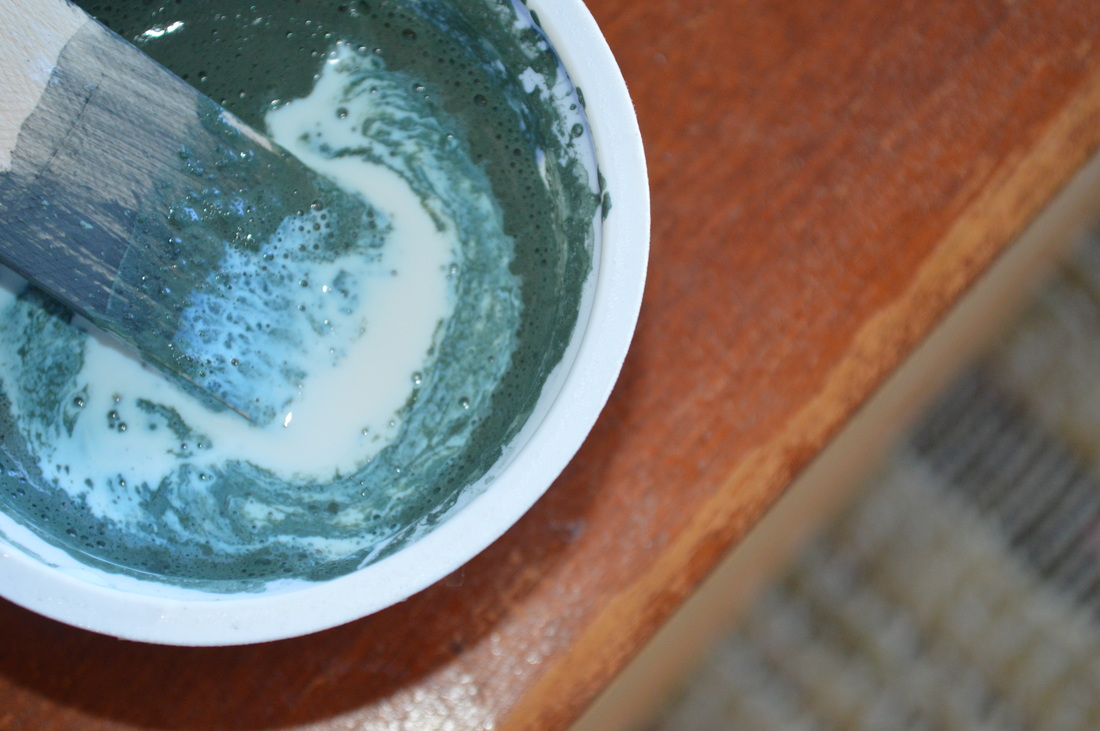
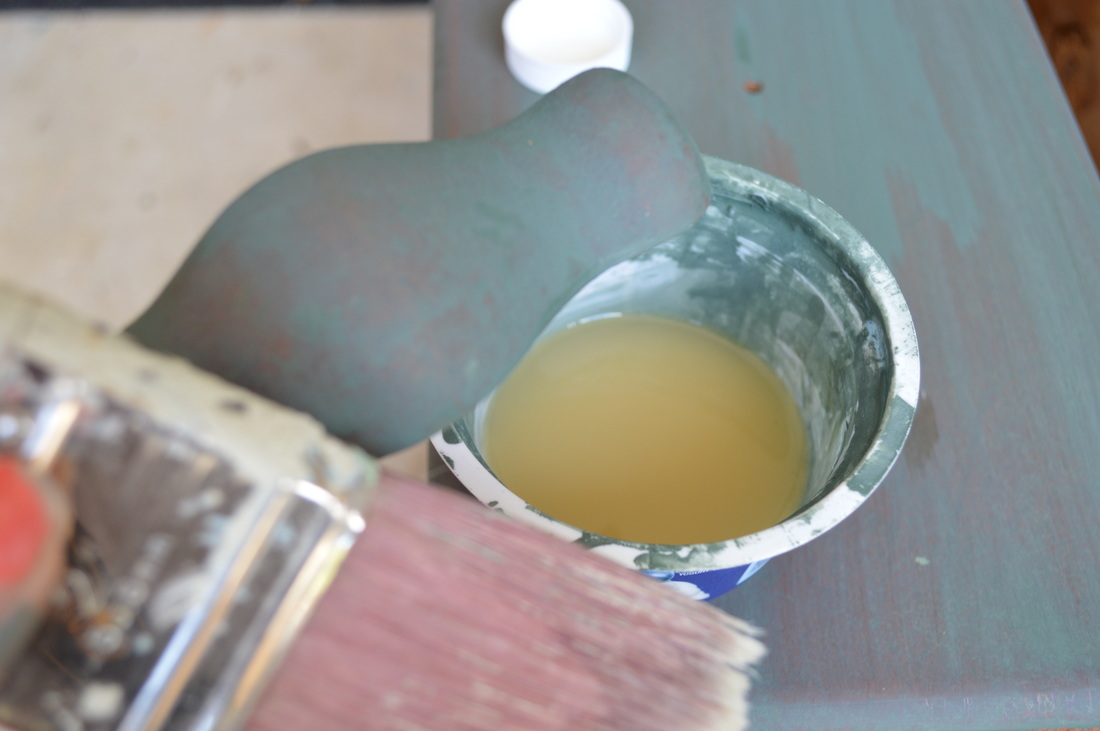
As I stated above, the powder must be mixed with equal portions of water and then stirred very well to diminish any lumps and release the full pigment. It will end up smooth and maybe some little bubbles from stirring as you see here. I press the lumps against the side of my container to break them down and mix in well. I am using a yogurt cup which I make several small batches of paint as I go, and then I can rinse and recycle when I am done. Keeping all things green here.
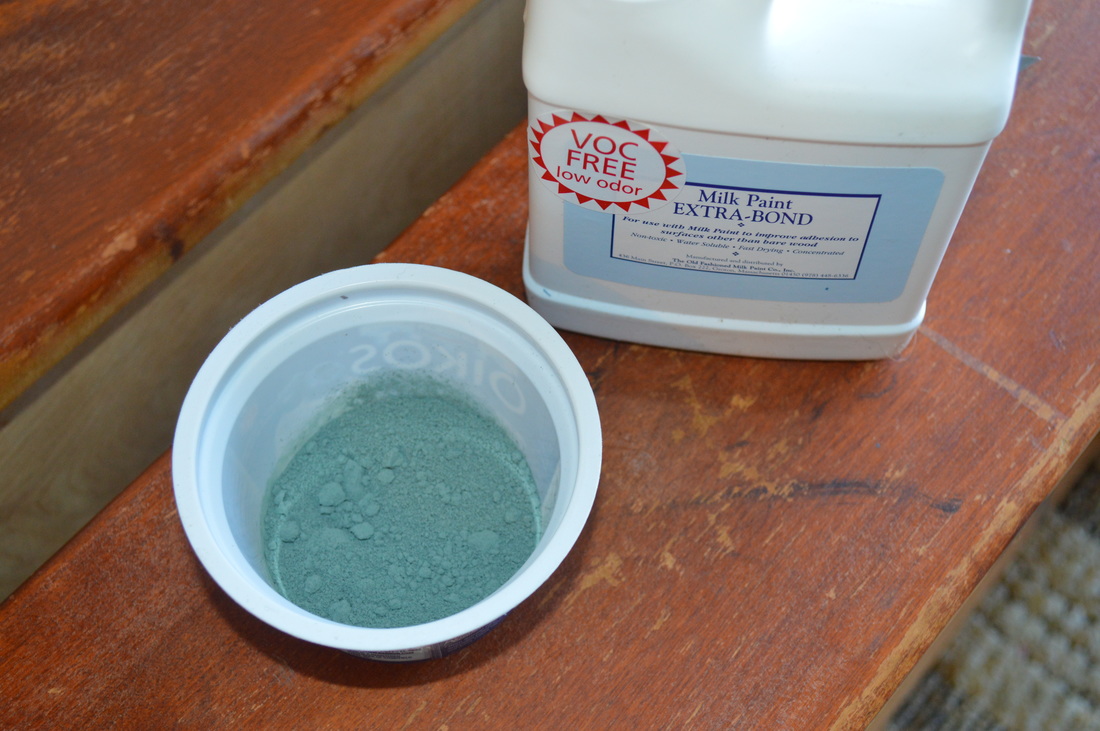

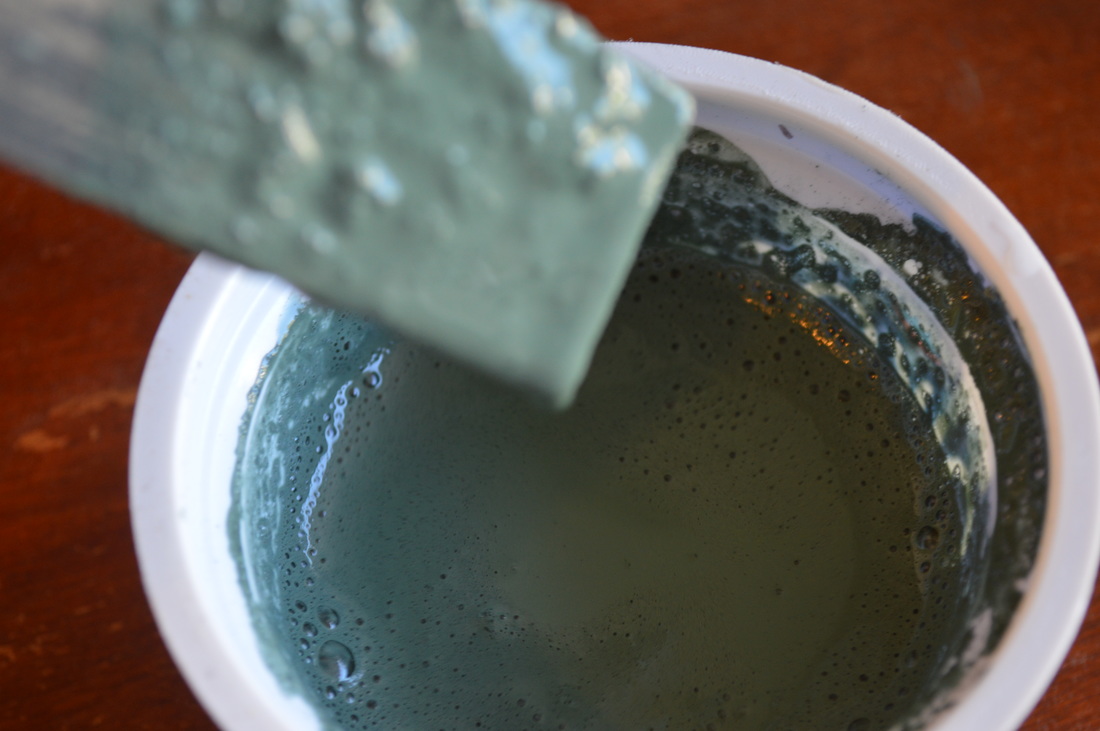
Because my surface was a bit shiny after a light sanding and wash, I added the extra bond for improved adhesion of the paint to the wood. I was not looking for chipping at this point. This is a breeze to add. Just follow instructions on the bottle.
Paint time. Here is the dresser after my first coat of the Sea Green. I was doing two coats of this because I wanted it to show through the Buttermilk after the crackling process.
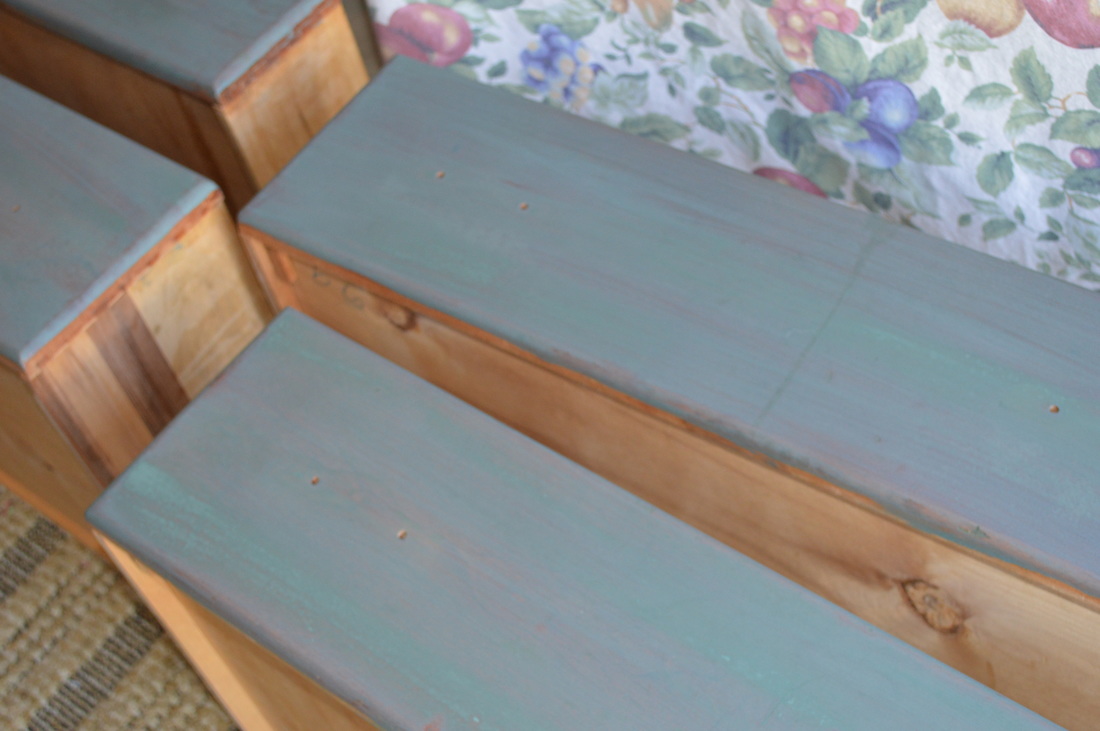
Do not be daunted or deterred after your first coat which may look disastrous. There is a little milk paint miracle which occurs with the second coat. My heart dropped to my ankles when I first used milk paint. I had never seen it nor used it on anything and was devastated when I applied the first coat and saw streaks and bare spots and a shady texture. But then. Then the magic happened when I persevered to paint the second coat. Heed my words, do not give up. It will be beautiful.
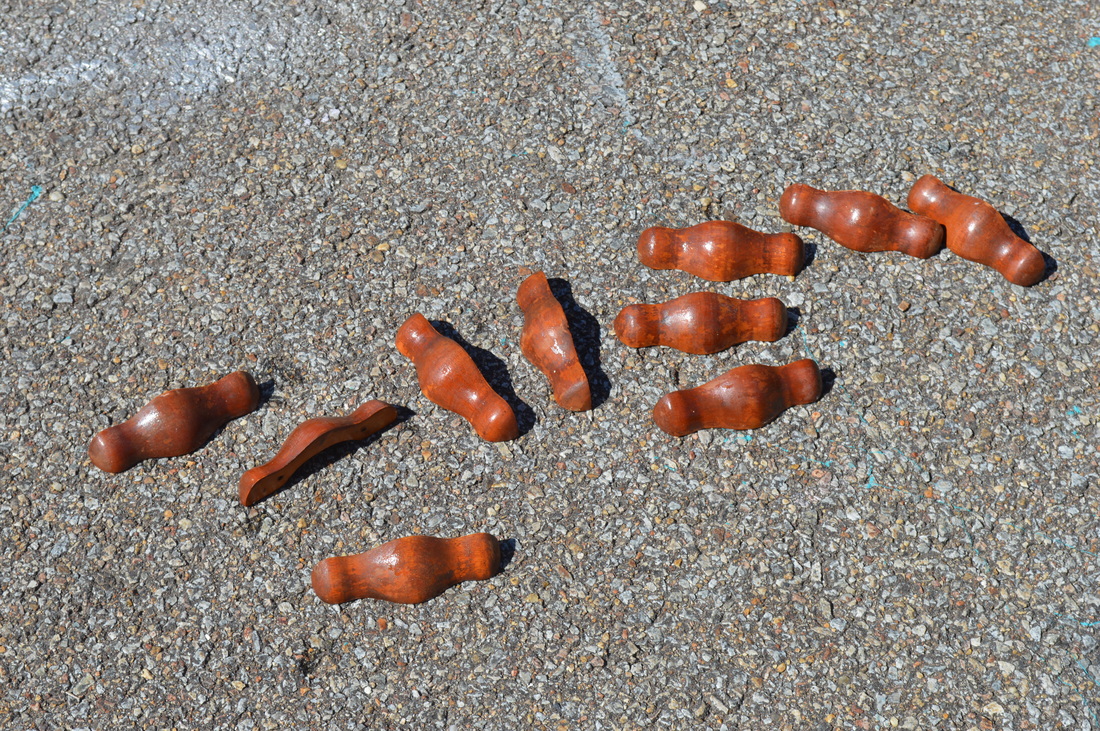
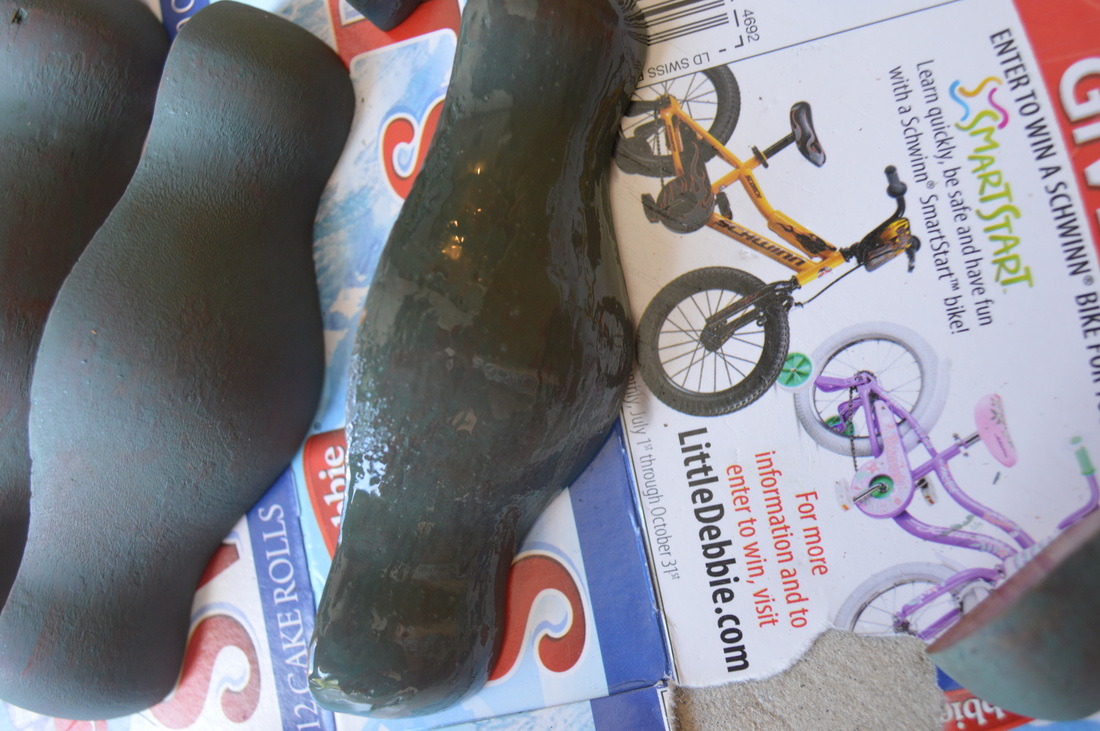
Next I scrubbed and left my handles to sunbathe while they waited their turn to be coated in OFMP's paint and then the antique crackle medium.
Next I scrubbed and left my handles to sunbathe while they waited their turn to be coated in OFMP's paint and then the antique crackle medium.
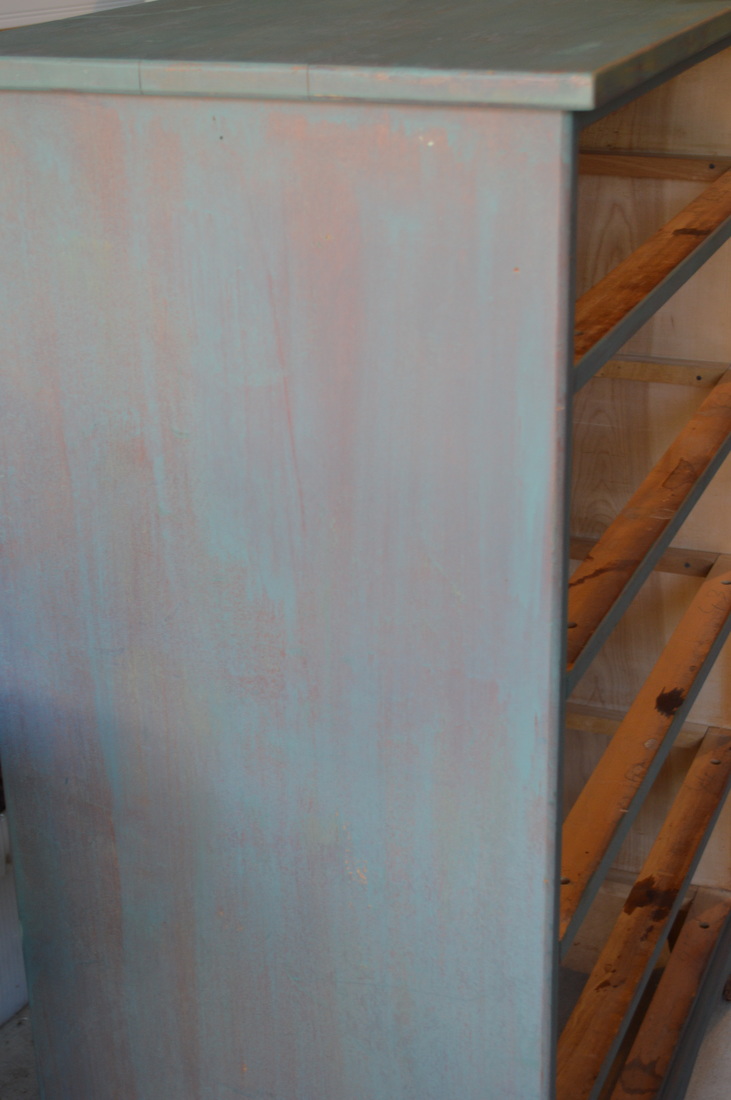
The crackle medium is very thick and sticky. It is pretty easy to layer on the paint and you can see the sheen so you know where you may have missed coverage which is great for being thorough.
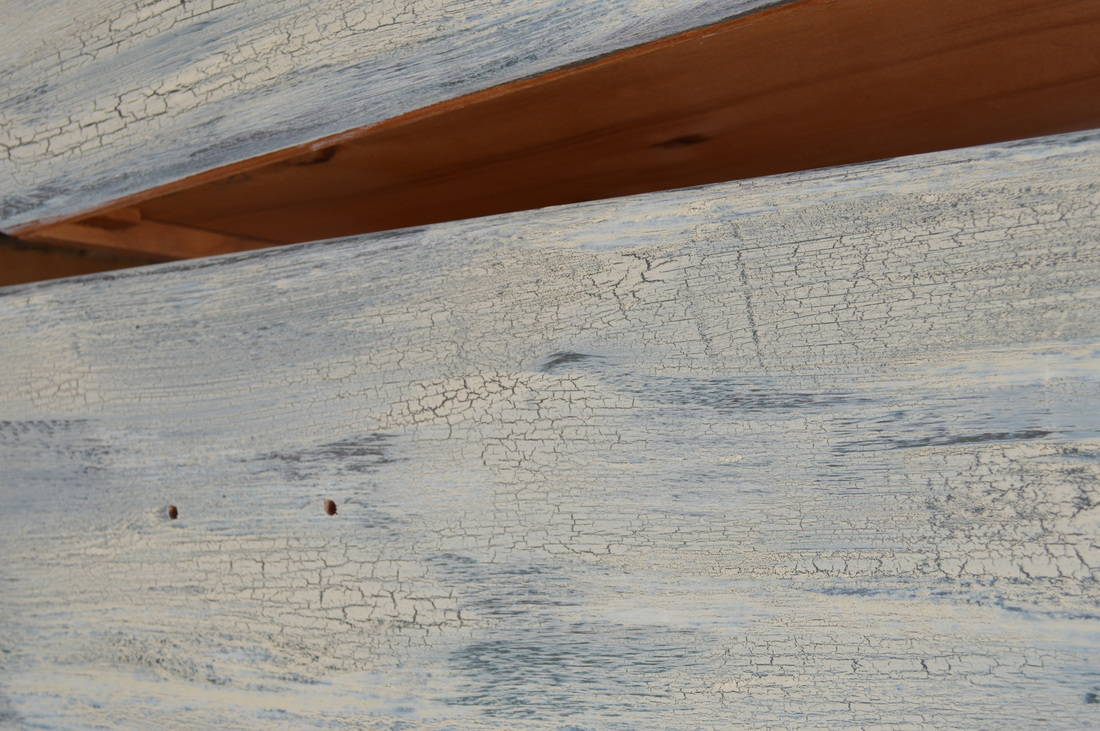
After a two hour drying period, I began to paint the top color of Buttermilk that would activate the crackling. This was really cool to observe. The paint begins to dance right before your eyes. Luscious crackles and breaks travel along a moment after each stroke of paint. Be sure to follow the directions on how to apply the paint over the medium. It can be a little tricky at first, but not difficult.


I salivate.
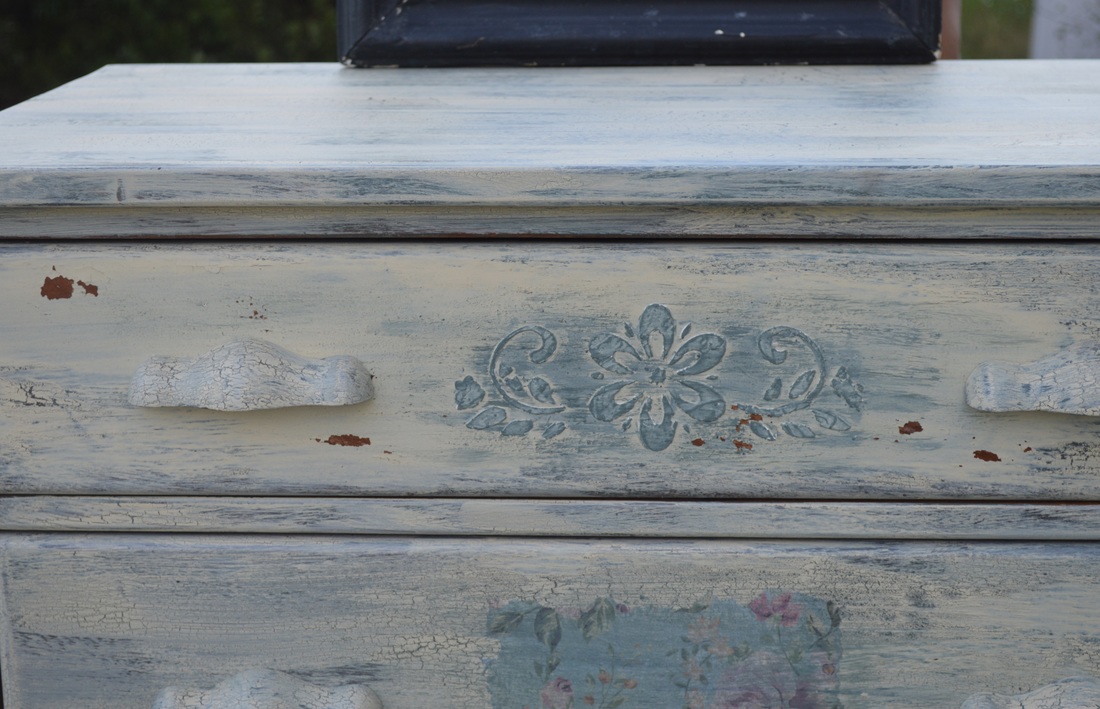
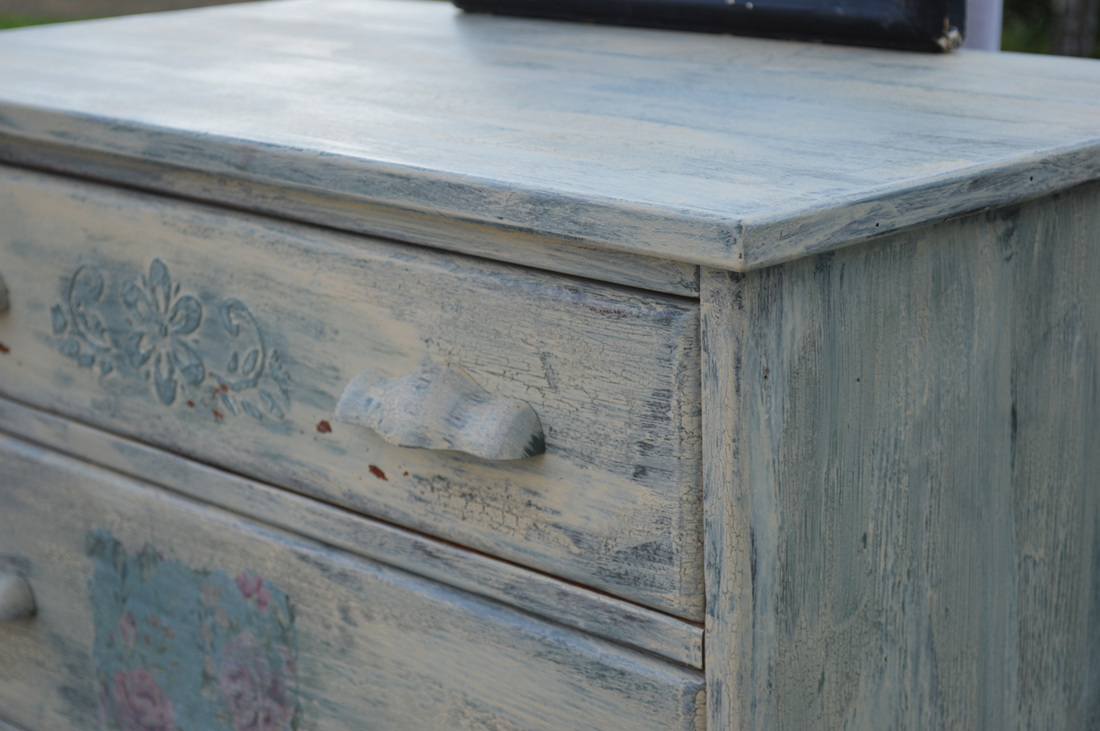
I let this set for a few hours and then I began adding some decorative detailing to the drawers. For the shallower top drawer, I applied a raised stencil which I would then brush over with the two paints alternating layers to get the tone I wanted. The first step is to measure your stencil to center it. I like to use the pull holes as a guide.
I let this set for a few hours and then I began adding some decorative detailing to the drawers. For the shallower top drawer, I applied a raised stencil which I would then brush over with the two paints alternating layers to get the tone I wanted. The first step is to measure your stencil to center it. I like to use the pull holes as a guide.
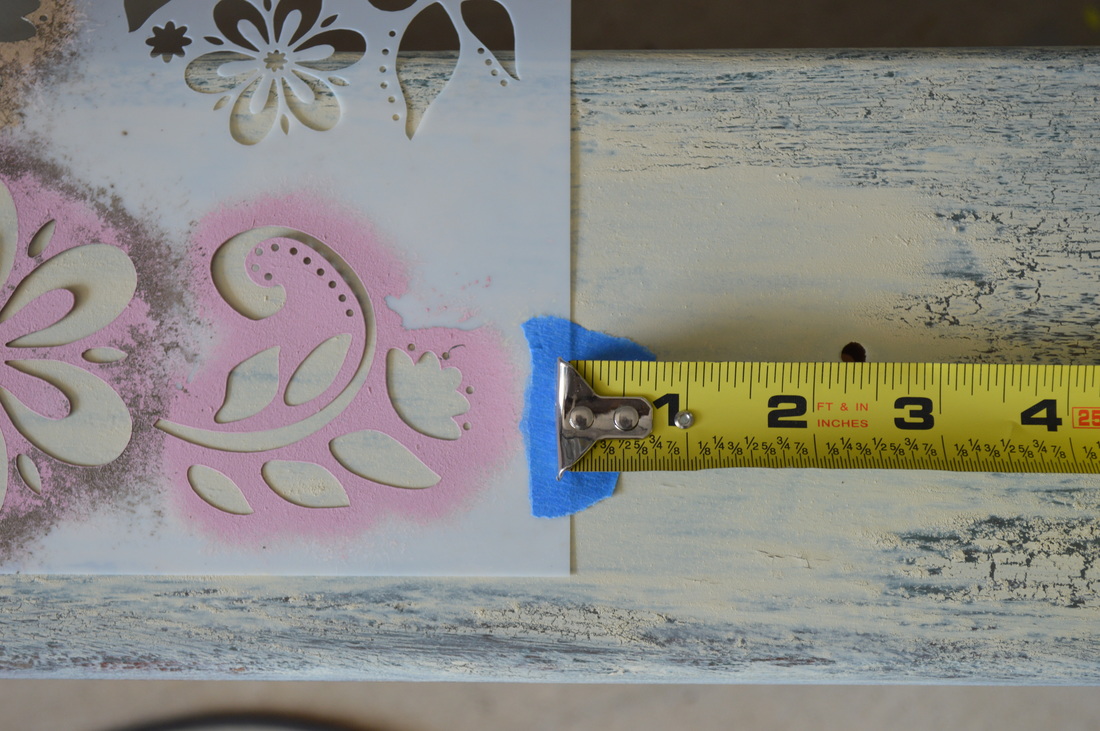
Once you have your stencil in place, tape it down with painter's or frog tape. I use spackle or joint compound to create my raised stencils. I use a credit card to smooth it over the entire stencil. Once fully covered and fairly leveled, let sit for just a minute and then slowly lift tape and pull back the stencil.
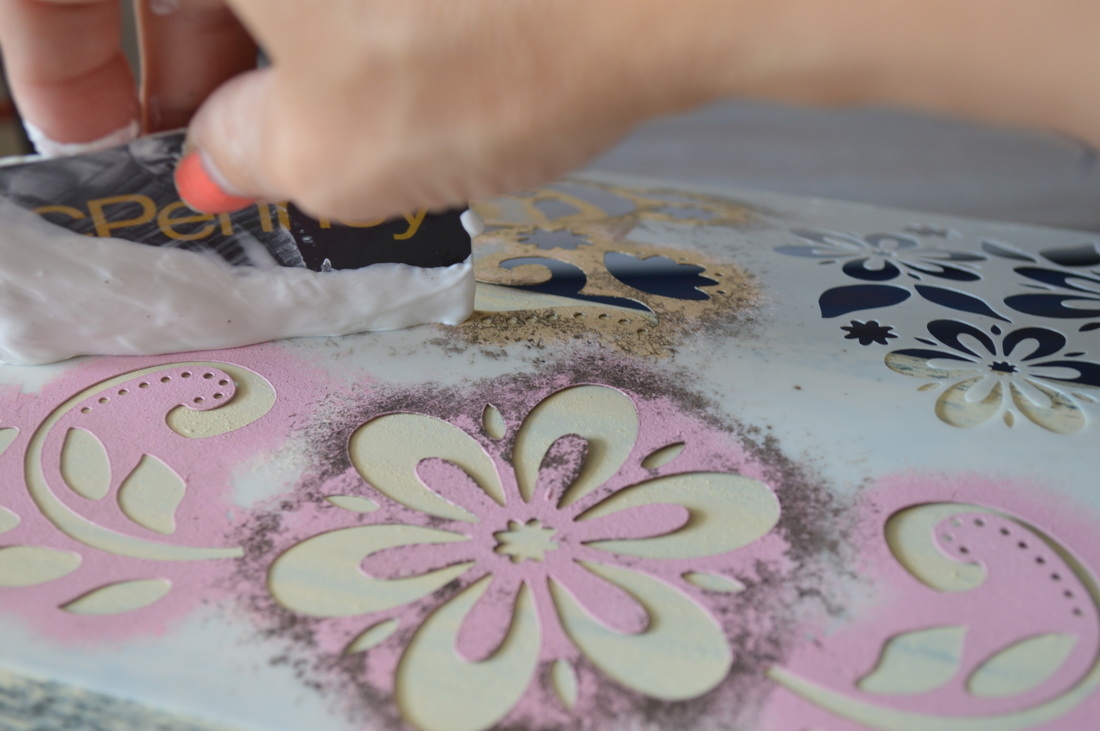
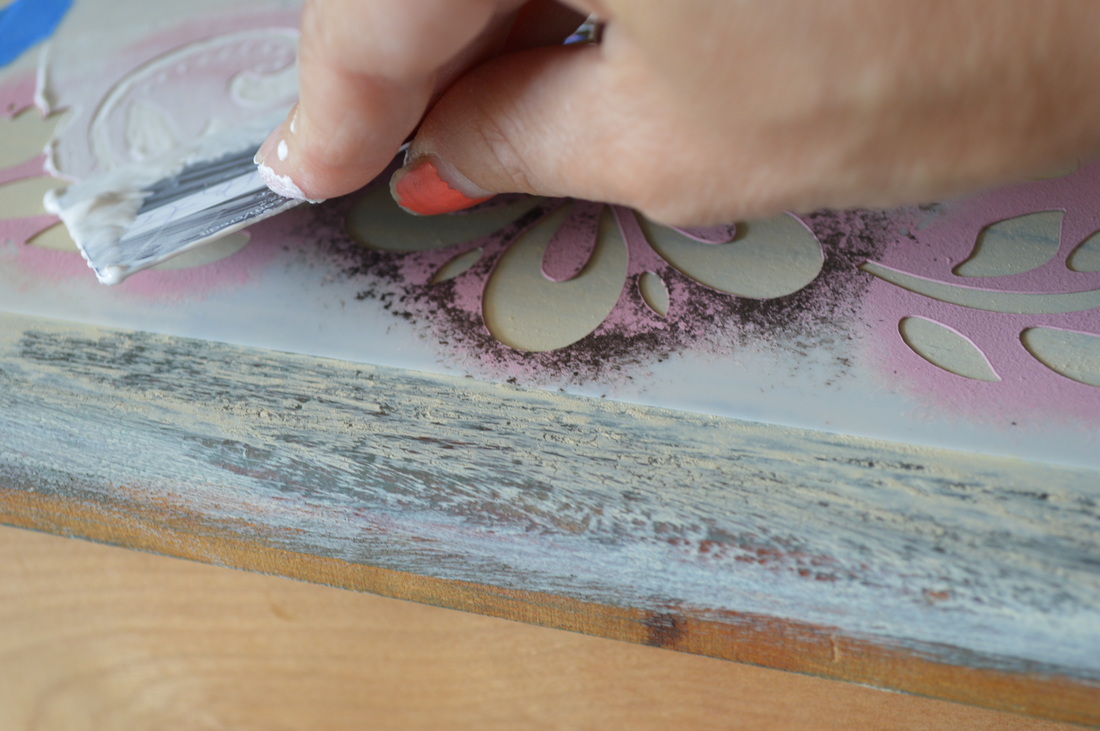
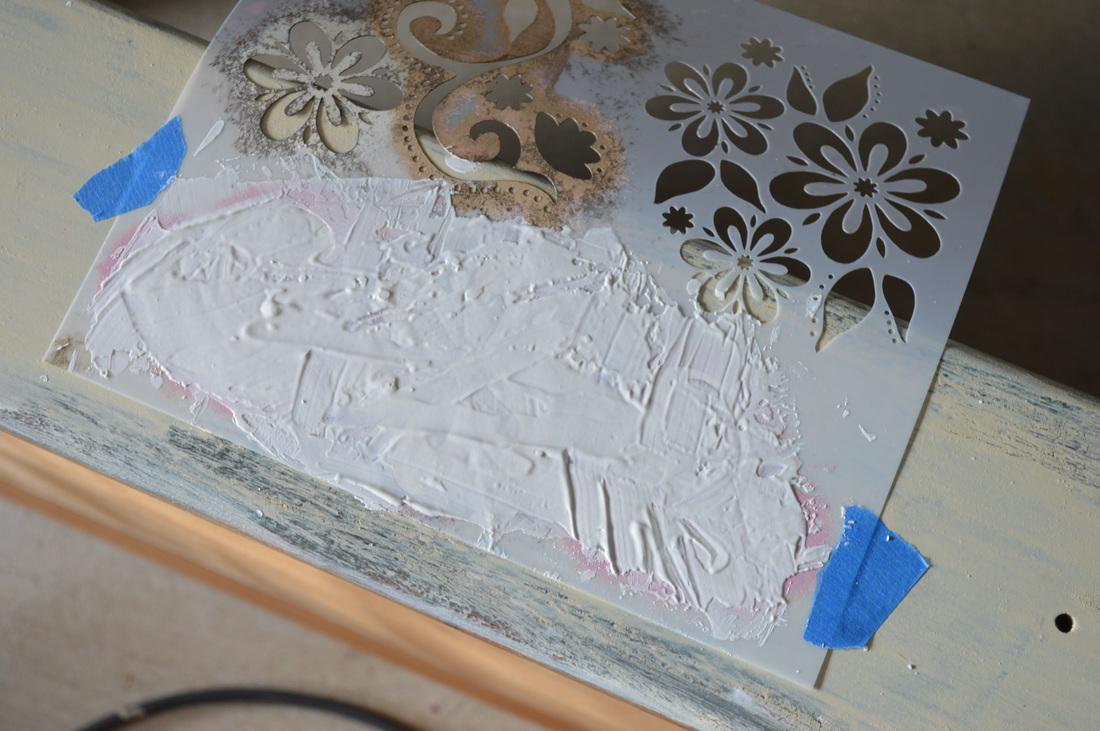

Pretty nifty, right? Now be patient and let this fully dry to hardness. Then you can paint it and topcoat it.
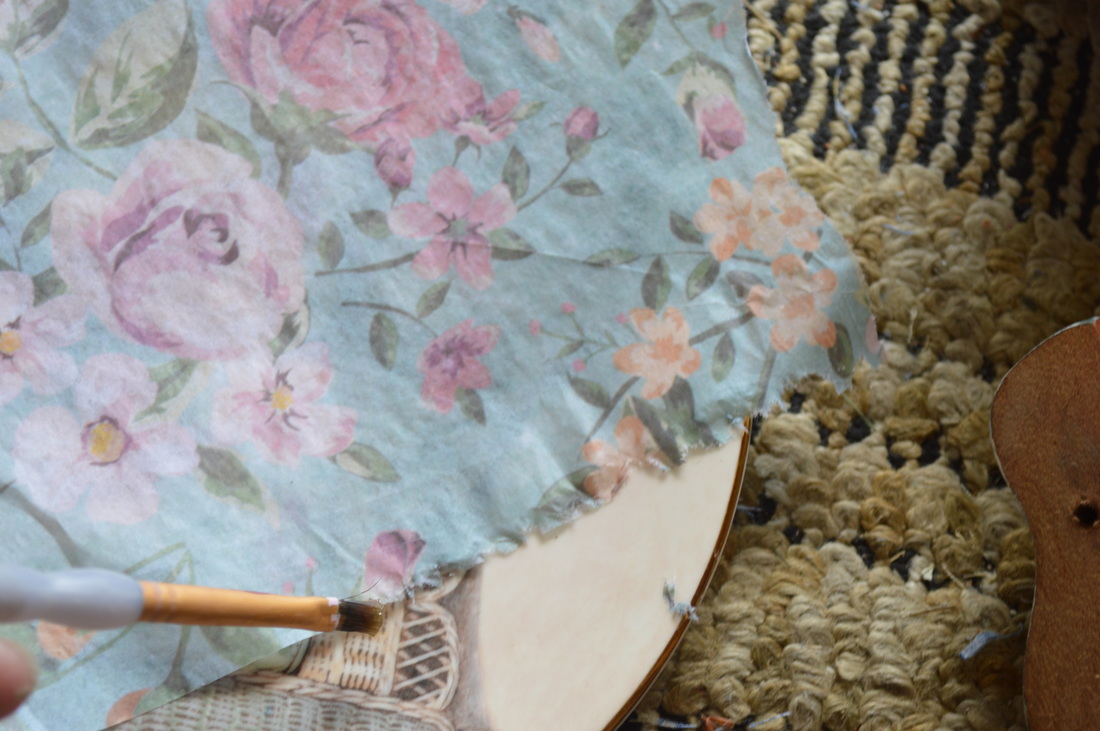
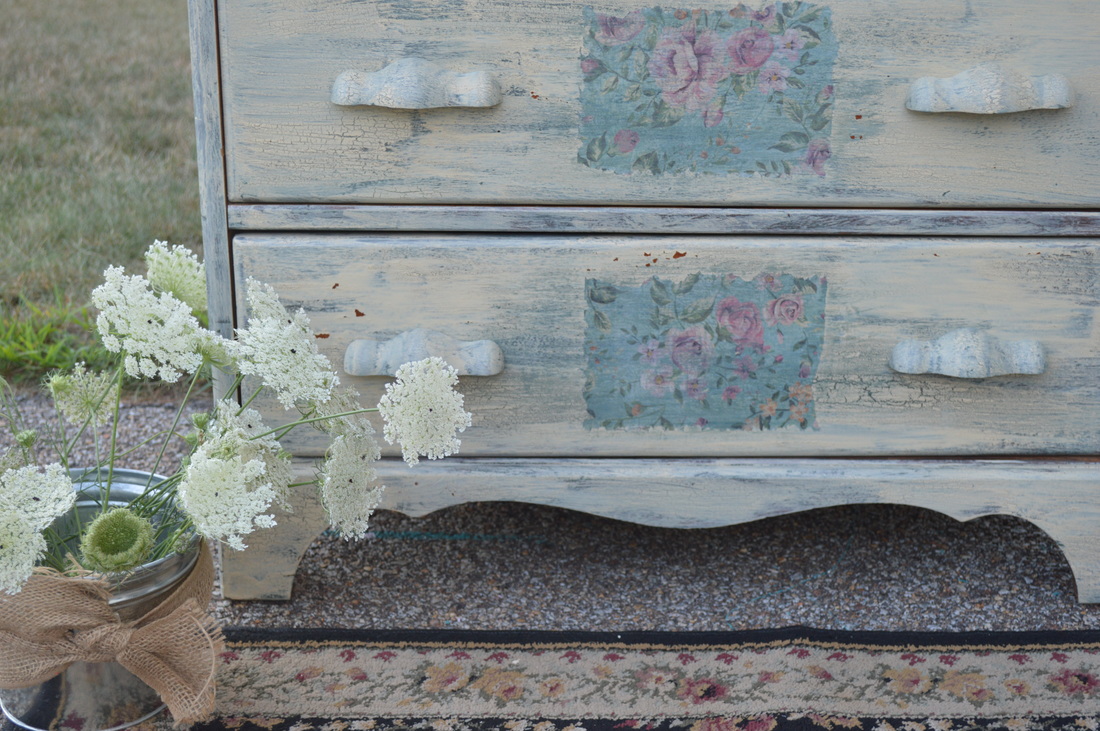
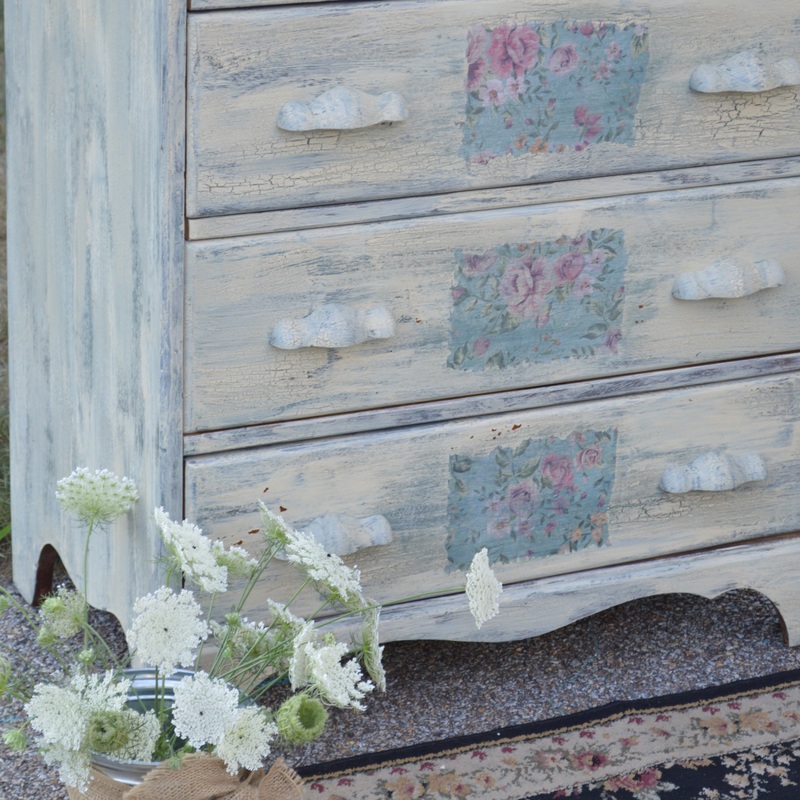
I was also using some tissue paper to decoupage the centers of the rest of the drawers. To achieve a tattered edge which is more complementary to a shabby chic appeal, I use a small paint brush and dab water along the edges pulling them away.
I was also using some tissue paper to decoupage the centers of the rest of the drawers. To achieve a tattered edge which is more complementary to a shabby chic appeal, I use a small paint brush and dab water along the edges pulling them away.

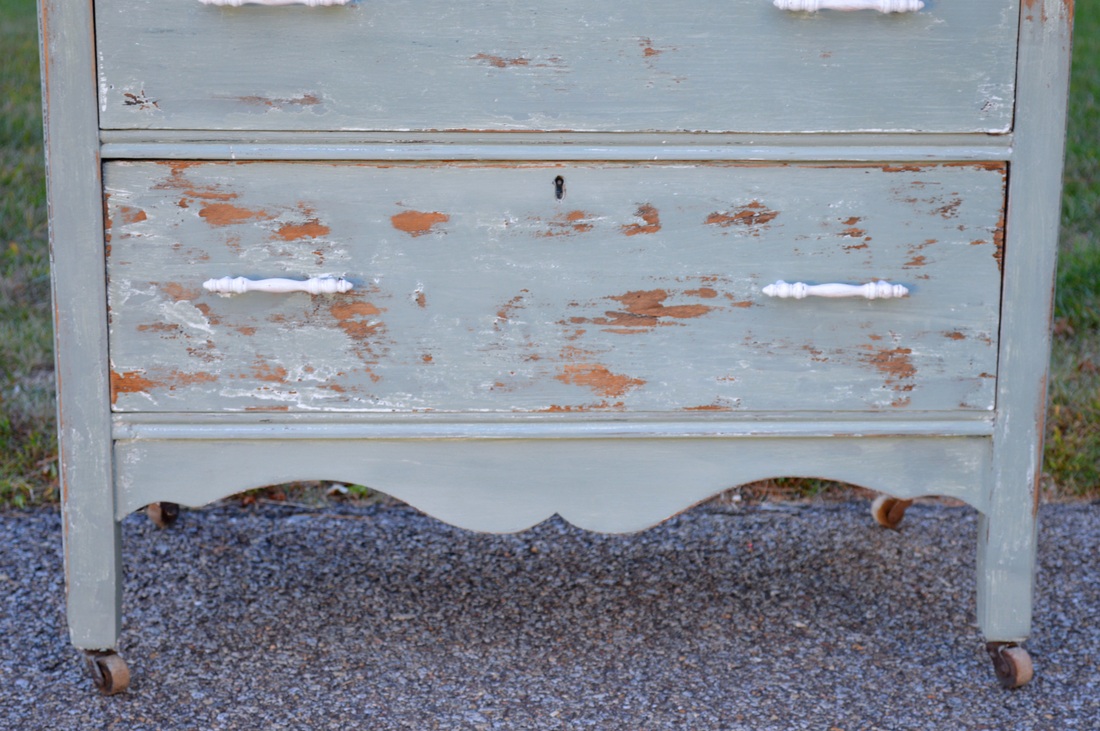
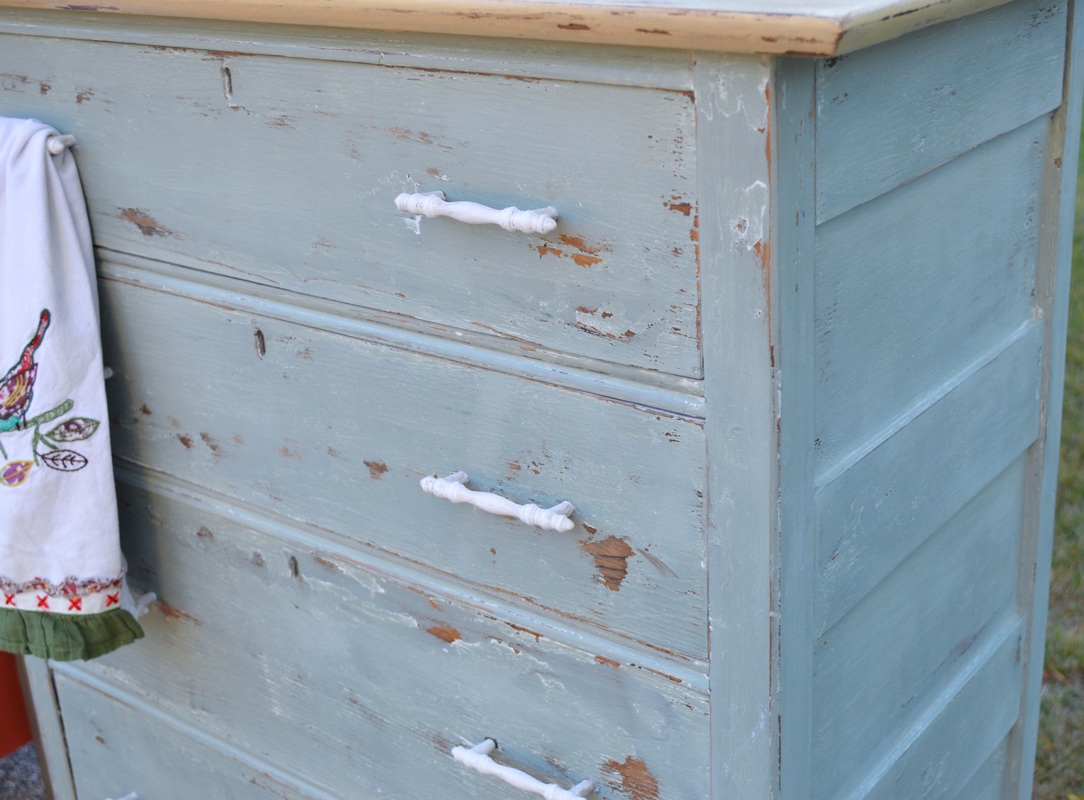
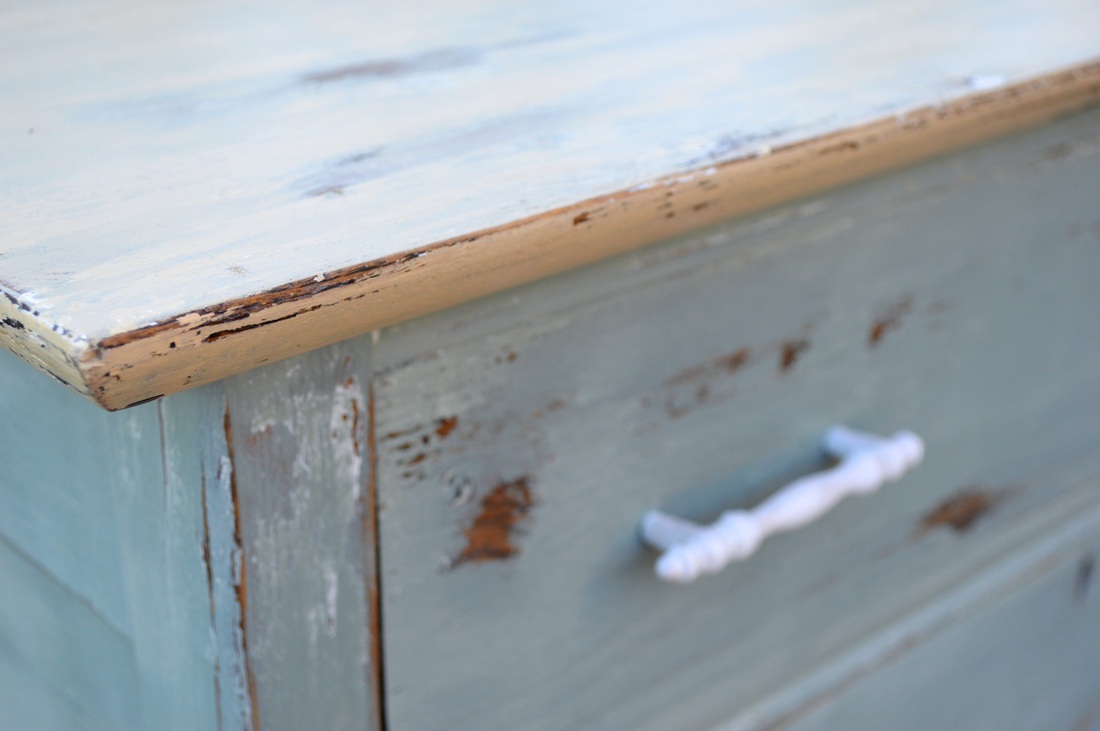
After all the crafty fun, here is my scrumptiously shabby country chic dresser made perfect with Old Fashioned Milk Paint products.
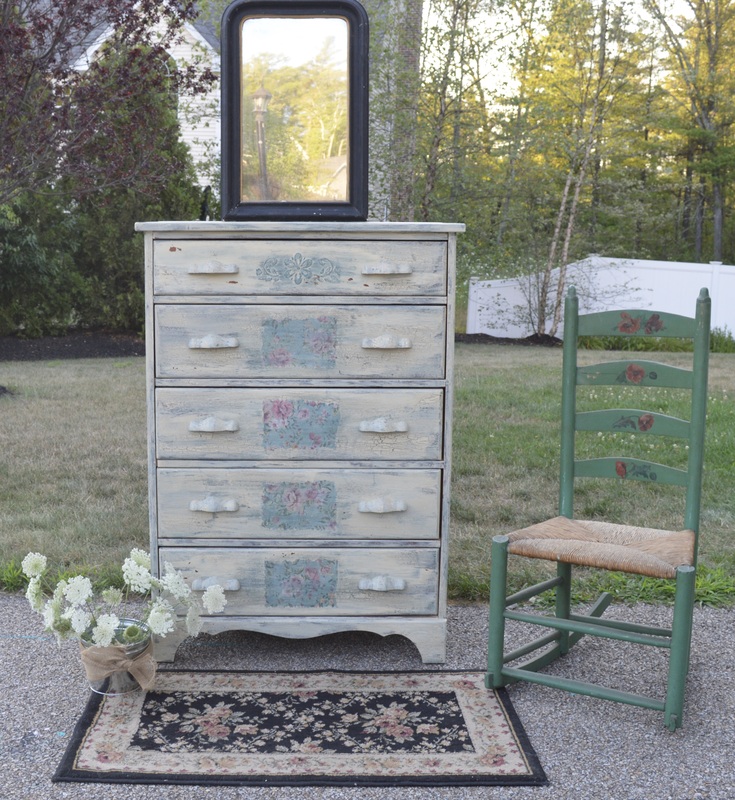
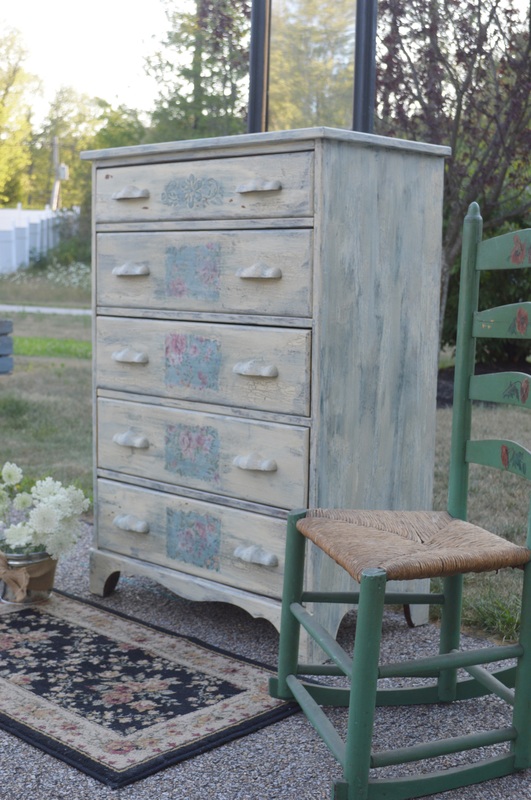
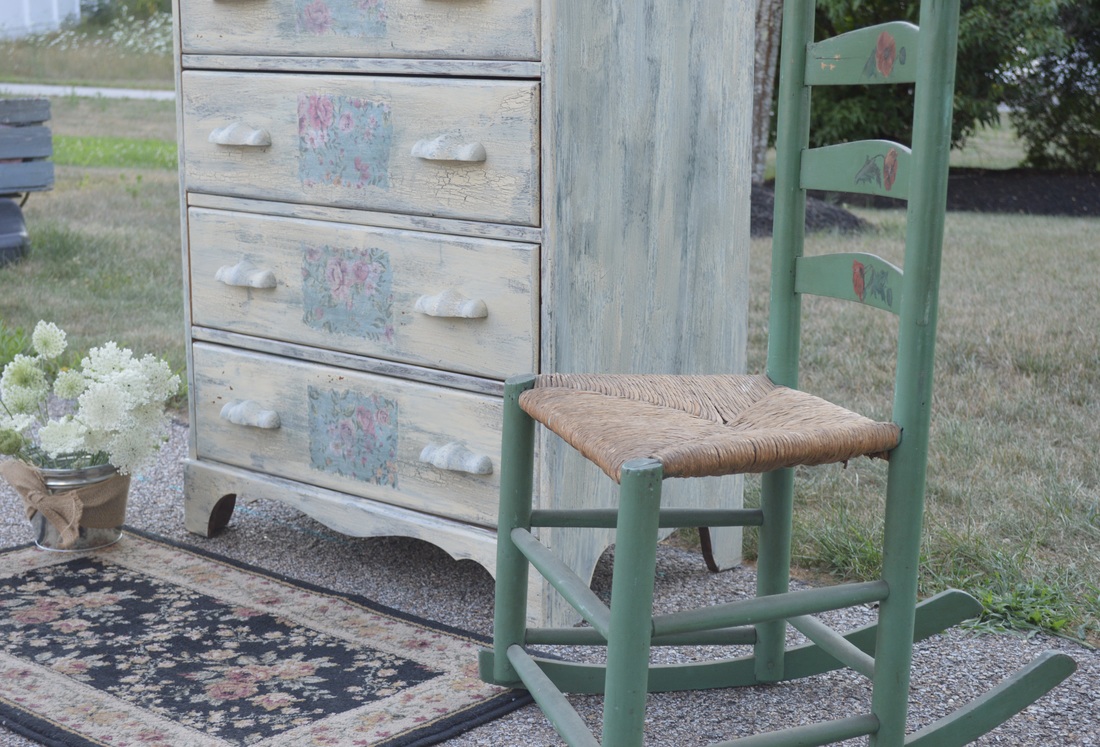
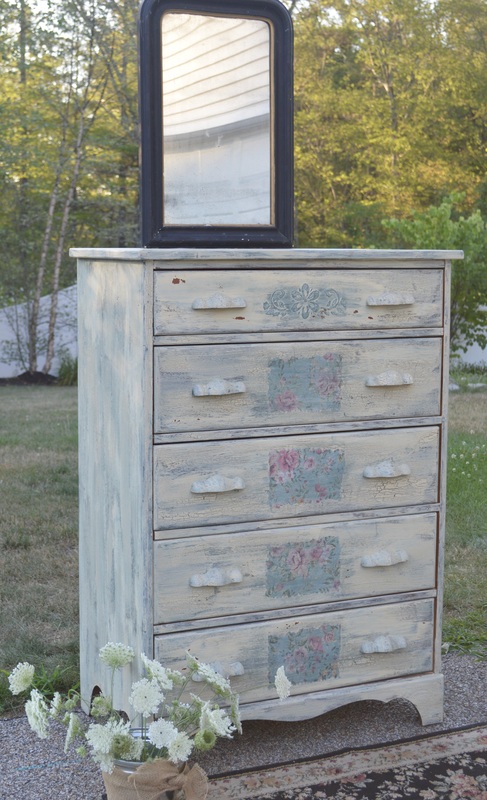


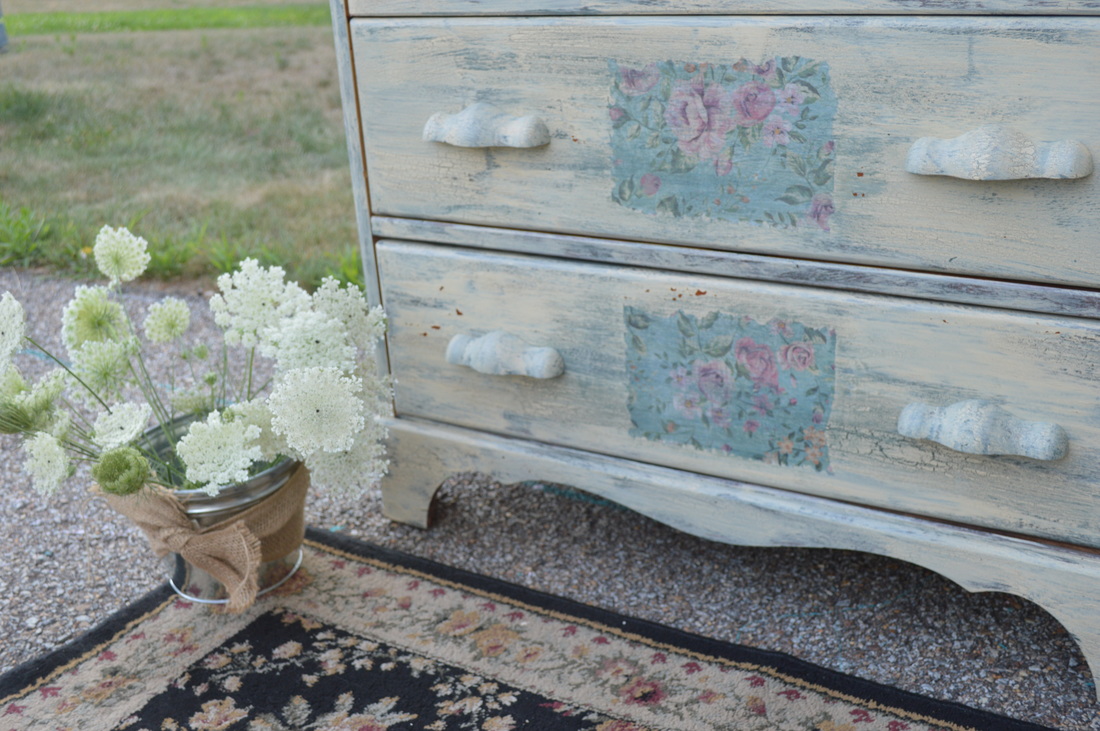
Crackles, chips, shades and tones...perfection.
Though OFMP provided product for me to complete this project, all opinions are sincerely my very own.
#oldfashionedmilkpaintco #DIYGreen #OFMP #truemilkpaint#OFMPbrandblogger #OFMPblogger
Though OFMP provided product for me to complete this project, all opinions are sincerely my very own.
#oldfashionedmilkpaintco #DIYGreen #OFMP #truemilkpaint#OFMPbrandblogger #OFMPblogger

 RSS Feed
